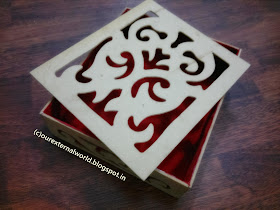
After a long hiatus from doing any DIY posts here I am with a simple to do project. And the end result is a gorgeous storage option for your jewelry and other trinkets!
 |
| DIY Jewelry Storage Box |
DIY Tutorial On How To Create A Jewerly Box
This tutorial is going to be completely through pictures. So lets get started
 |
Things You Will Need For This Project
The box that I have used is a wooden board box which has a beautiful cut-out pattern on the lid as well as the sides. You can use any box that you might have lying around. Cardboard boxes work just fine.
|
 |
| Step 1. Clean the Empty Box |
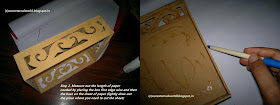 |
| Step 2: Measure & Draw The Sides and Base of The Box on Your Paper |
 |
| Step 3: Cut Out The Measured Paper |
 |
| Step 4: Measure & Draw Shapes For the Sides of The Box |
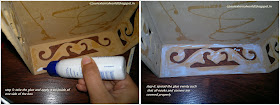 |
Step 5: Apply Glue To One of the Inner Sides Of the Box
Step 6: Spread Out the Glue To Cover Every Corner |
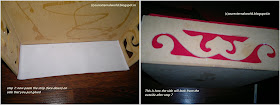 |
| Step 7: Stick The Paper Right Side Down On The Glued Side Of The Box |
 |
| Step 8: Repeat steps 5,6,and 7 For Remaining Sides Of The Box |
 |
| Step 9: Cut Off (or fold in) Any Longer Edges Of The Paper |
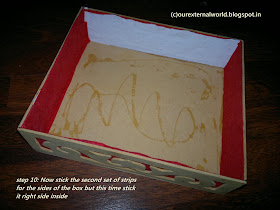 |
| Step 10: Paste The Second Layer Of Paper (right side out) On The Sides Of The Box |
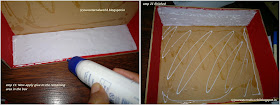 |
Step 11: Apply Glue To The Remaining Area Inside The Box |
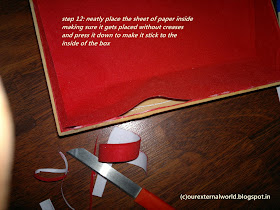 |
Step 12: Neatly Paste The Remaining Paper Inside The Box Making Sure to Press It Down Firmly So That There Are No Creases And It Sticks Properly To The Insdie Of The Box
|
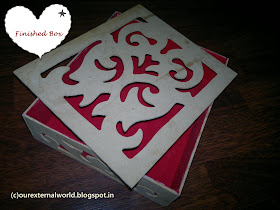
Once you are done the finished box should look somewhat like the image below.
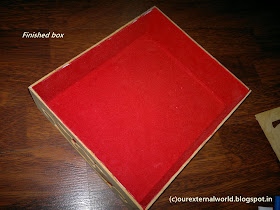 |
| Finished Inside Of Box |
 |
| DIY Jewelry Storage Box |
I hope you guys enjoyed this picture tutorial and will get inspired to create something amazing of your own. You can use the same concepts to redecorate any old box lying around. You can also experiment with different types of paper. I used velvet paper because it is very rich in texture.
Do share your thoughts and other variations of this that you can think of!


nice work, thats creative!!
ReplyDeletethanks Gowardhan!
Deletei like diy tuts, keep up the good work. thank you :)
ReplyDeletethanks dear, do let me know if there's anything particular you would like me to do a DIY on and I'll try my best to do it :)
Deletethanks Roobi!
ReplyDeleteLooks really good......
ReplyDeletethanks dear!
DeleteYour box is a beauty! Where can I buy those kind of boxes? I would love make the same one as yours! Thank you for posting this amazing DIY tutorial. :)
ReplyDeleteElias Madden
Hi Elias, I got this box with muffins inside as a gift from a friend. You can recycle any old box lying around with you. If you want the cutout effect then all you need to do is use cutout paper patterns (that you should be able to find at stationary stores) and back it with the darker colored plain paper and use the whole thing as a cover for your ordinary plain box - which means you are not only covering the inside of the box but also the outside!
DeleteKeep up Good Work ! SO many good ideas that I would have never thought of! Now I will start saving those shoe and banker boxes! Thanks for the great ideas! Long Term Food Storage
ReplyDeletethank you so much, I'm glad you found this useful
Delete