Guest post by Nicky
Nicky loves to do nail art and does an extremely good job of it! She sportingly agreed to do a post for OurExternalWorld where-in she has shared a lovely nail art that reminds me of Rainbow Dash from the My Little Pony collection - one of my childhood favourites! Nicky this is what I have named your nail art.
2) White nail paint
3) Black nail paint
4) Stamping plates (used here W111 and W117 from Winstonia)
5) Stamper
6) Sponge (makeup sponge works best)
7) Base coat
8) Top coat
9) Transparent shimmery nail paint like fairydust from China Glaze (optional)
Collect everything before you begin!
First apply the base coat of your choice and let it dry completely. Then take a sponge, here I used a makeup sponge. Regular sponge from kitchen could also be used to do this manicure. But the smoothness in blending colors could be different.
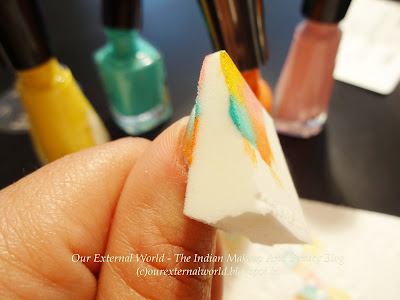
Now apply a base color and I used plain white. After that apply your choice of four bright colors on the sponge, here I have used orange, red, yellow and blue. Depending on your nail size you could use as little as two colors to achieve the same look.
Now dab that sponge lightly on a paper towel once and then dab it on your nail and keep dabbing lightly moving in an up and down fashion covering the entire nail. You can repeat this step as many times as you need to. Just make sure each layer is completely dry before sponging again otherwise you will start smudging the bottom layers and ruin the whole thing.
After that I added a coat of fairydust from china glaze but this is optional. This just adds some nice soft shimmer to the finished look. Sponging will make the nail little bumpy but applying top coat will smooth out the whole thing and will blend the colors better.
After this I cleaned up the cuticles and then stamped the images on the nails..
First stamp all the nails with the rainbow pattern using a white nail paint. Then once it dries off stamp the accent nail with the image of a horse.
Hope you all liked it.
Nicky loves to do nail art and does an extremely good job of it! She sportingly agreed to do a post for OurExternalWorld where-in she has shared a lovely nail art that reminds me of Rainbow Dash from the My Little Pony collection - one of my childhood favourites! Nicky this is what I have named your nail art.
My Little Pony Rainbox Dash Nail Art
 |
| My Little Pony Rainbox Dash Nail Art |
To achieve this look you will need
1) 4 bright nail paints,2) White nail paint
3) Black nail paint
4) Stamping plates (used here W111 and W117 from Winstonia)
5) Stamper
6) Sponge (makeup sponge works best)
7) Base coat
8) Top coat
9) Transparent shimmery nail paint like fairydust from China Glaze (optional)
 |
| My Little Pony Rainbox Dash Nail Art |
 |
| My Little Pony Rainbox Dash Nail Art |
Collect everything before you begin!
First apply the base coat of your choice and let it dry completely. Then take a sponge, here I used a makeup sponge. Regular sponge from kitchen could also be used to do this manicure. But the smoothness in blending colors could be different.
Now apply a base color and I used plain white. After that apply your choice of four bright colors on the sponge, here I have used orange, red, yellow and blue. Depending on your nail size you could use as little as two colors to achieve the same look.
 |
| My Little Pony Rainbox Dash Nail Art |
 |
| My Little Pony Rainbox Dash Nail Art |
After that I added a coat of fairydust from china glaze but this is optional. This just adds some nice soft shimmer to the finished look. Sponging will make the nail little bumpy but applying top coat will smooth out the whole thing and will blend the colors better.
 |
| My Little Pony Rainbox Dash Nail Art |
After this I cleaned up the cuticles and then stamped the images on the nails..
 |
| My Little Pony Rainbox Dash Nail Art |
First stamp all the nails with the rainbow pattern using a white nail paint. Then once it dries off stamp the accent nail with the image of a horse.
 |
| My Little Pony Rainbox Dash Nail Art |
About the author: I am Nicky. Currently taking care of my 3 year old son. In May 2012, I discovered a new hobby of nail stamping. Still trying to learn many new things. You can check out more of my work on my facebook account.
Thank you so much Nicky for sharing this awesome nail art! Girls please leave your comments for Nicky in the comment section below. Lets tell her what a lovely piece of work this is!

looks pretty:)
ReplyDeleteThank you Shallu..
DeleteBeautiful nail art nicky..:)
ReplyDeleteThanks Puja...
DeleteThank you Shilpa for sharing a piece of rainbow...
ReplyDeleteThis is beautiful Nicky... Love the stamping :)
ReplyDelete