Our External World - Indian Makeup Beauty Fashion Travel
Showing posts with label tutorial. Show all posts

Wednesday, May 6, 2015

DIY Makeup Storage Box Tutorial Using Old Boxes

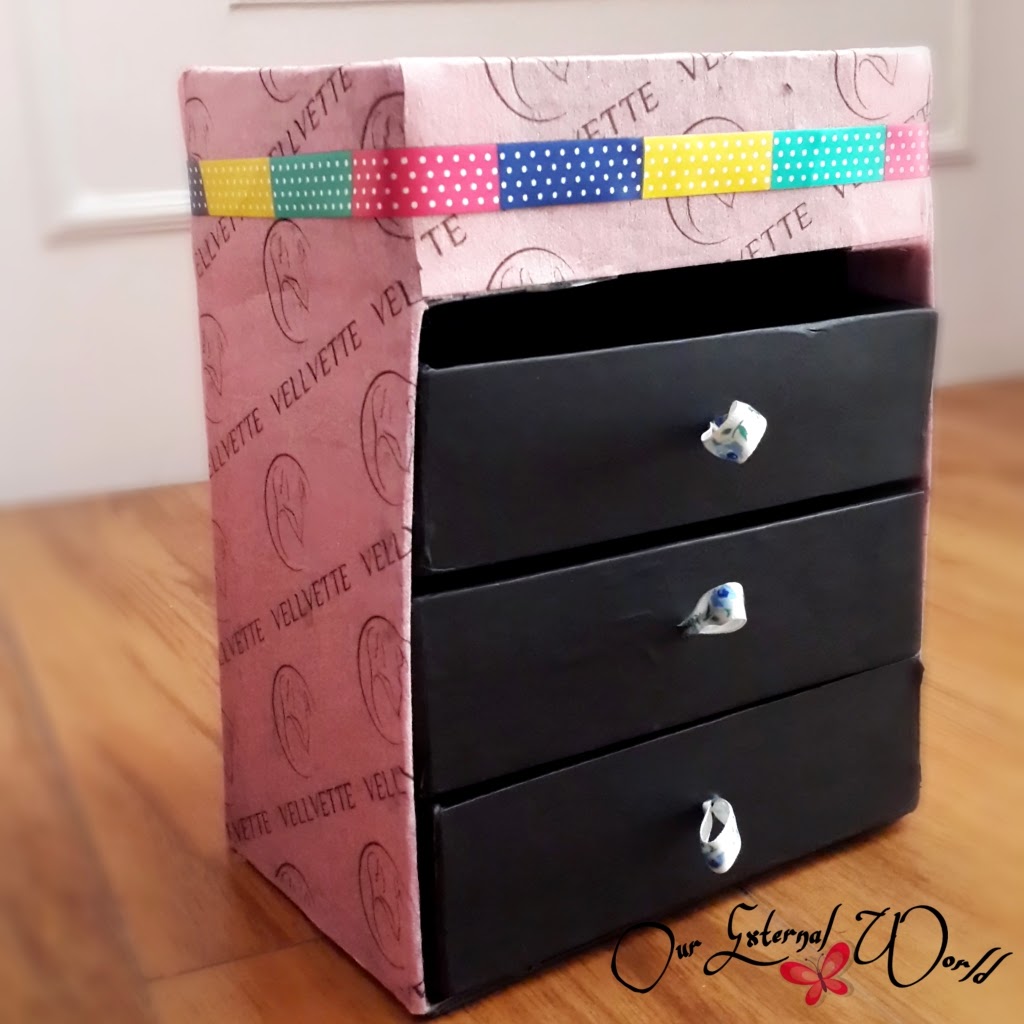
I don't remember the last time I posted a DIY craft here. Recently I was cleaning up one of my cupboards and found a whole stack of small black beauty boxes that I had been saving up. I was saving them up for creating a set of drawers to keep small knick knacks. Finally they saw the light of the day. 
DIY Makeup Storage Box Tutorial Using Old Boxes, jewellery storage
DIY Makeup Storage Box Tutorial Using Old Boxes


The tutorial is something I had seen almost two years ago on the Sweet & Bitter Blog (yes I've been saving these boxes since a very long time!) My steps are slightly different but the basic idea is the same. 

So lets quickly list down the things you will need:

1. 4 small boxes with lids
2. A pair of scissors
3. Glue (hot glue gun will do as well)
4. A whole puncher
5. Some wrapping paper and ribbons

Monday, April 27, 2015

Nail Art Using Nail Vinyls - Whats Up Nails

Hello everyone! Before I tell you about nail vinyls I have a small update, the winner of Uber Chic beauty plates has been declared on instagram. AND, there is another instagram giveaway where one person can win $15 of products of their own choice from Bornprettystore.com - so head on over to www.instagram.com/OurExternalWorld

Now here we go, so first what are nail vinyls? Nail vinyls are like stickers that act as stencils on your nails to help create patterns. I used nail vinyls from Whats Up Nail Art Store. 

Nail Art Using Nail Vinyls - Whats Up Nails, how to, tutorial
Nail Art Using Nail Vinyls - Whats Up Nails

How To Use Nail Vinyls


The steps to follow when doing nail art using vinyls are as follows:
  1. Apply a base polish color (or clear polish) and let it dry completely.
  2. Using a plucker pick out the nail vinyl design you want and place it on the nail gently pressing it down evenly.
  3. Make sure the nail vinyl is securely placed specially if the design is such that it overlaps your nail bed edges.
  4. Now apply the next coat of polish - try picking a distinctly contrasting color. If the polish is pale then quickly apply multiple coats of the polish. The polish is to be applied over the nail art vinyl.
  5. Before the polish dries out use the plucker remove the nail vinyl following the opposite direction in which you applied the nail vinyl. This is very important if you have applied multiple vinyls to create some pattern.
  6. Now top off with clear polish and you are done!


I tried out the V-shaped vinyls called Chevron tips (and placed them straight) to create the first nail art that you see in the image below. For the second image I used the thin zig-zag pattern vinyl to create a lightening effect. The third and forth nail art was created using the moroccan nail art stickers.

Whats Up Nail art store nail vinyls are very easy to use. The vinyls come off easily without pulling off the base polish. If its your first time with vinyls stick to simpler patterns.

Nail Art Using Nail Vinyls - Whats Up Nails, tutorial, how to
Nail Art Using Nail Vinyls - Whats Up Nails

And here is a closer look at the different nail art vinyls that I have.

Monday, April 20, 2015

HPB Presents - Rainy Sky Using Pond Mani Technique (With Tutorial)

Hobby Polish Bloggers group is doing the theme of April Showers this month. I have been wanting to try out the Pond Mani nail art technique for quite sometime so I thought why not use that technique for this challenge.

This is what I came up with.
#HPBAprilShowers - Rainy Sky Using Pond Mani Technique (With Tutorial)

Pond Mani technique basically involves the use of a sheer polish. You apply the sheer polish then you  do some nail art on it. This is followed by another few layers of the sheer polish. You repeat this process until you get the desired effect.

Things that I used are Aquarelle Tints No 10 from El Corazon, Silver Foil Polish Kaleidoscope from El Corazon (for the rain) and What's Up Nails nail vinyls.
#HPBAprilShowers - Rainy Sky Using Pond Mani Technique (With Tutorial), whats up nails, el corazon, aquarelle tints, nail vinyls
#HPBAprilShowers - Rainy Sky Using Pond Mani Technique (With Tutorial)


Here is a step by step tutorial on how I achieved this nail art. I tried to capture the pictures at each stage. For the rain I used the dry brush technique using the silver polish. For every layer of dry brush 'rain' I coated with two layers of the sheer polish. On the accent nail I tried to create something like lightening using the nail vinyls.

Tuesday, March 17, 2015

Jamberry Nail Wraps Marsala In Bloom Review & Tutorial

Hi friends, I'm on a bit of a nail frenzy these days so here is again another nail post. Today I'm sharing with you nail wraps called Jamberry Nail Wraps in Marsala In Bloom. Jamberry is a consultant based service where you can subscribe to it and create your own business out of it by getting others to join you.

I wanted to try the nail wraps not for business purpose but just for the fun of having different ready-to-use patterns on my nails. So I got in touch with one of the consultants Rebecca (you can order from her by visitng here website HERE) who shipped out my first package to me.

Jamberry Nail Wraps Marsala In Bloom Review & Tutorial, pantone color of the year
Jamberry Nail Wraps Marsala In Bloom Review & Tutorial
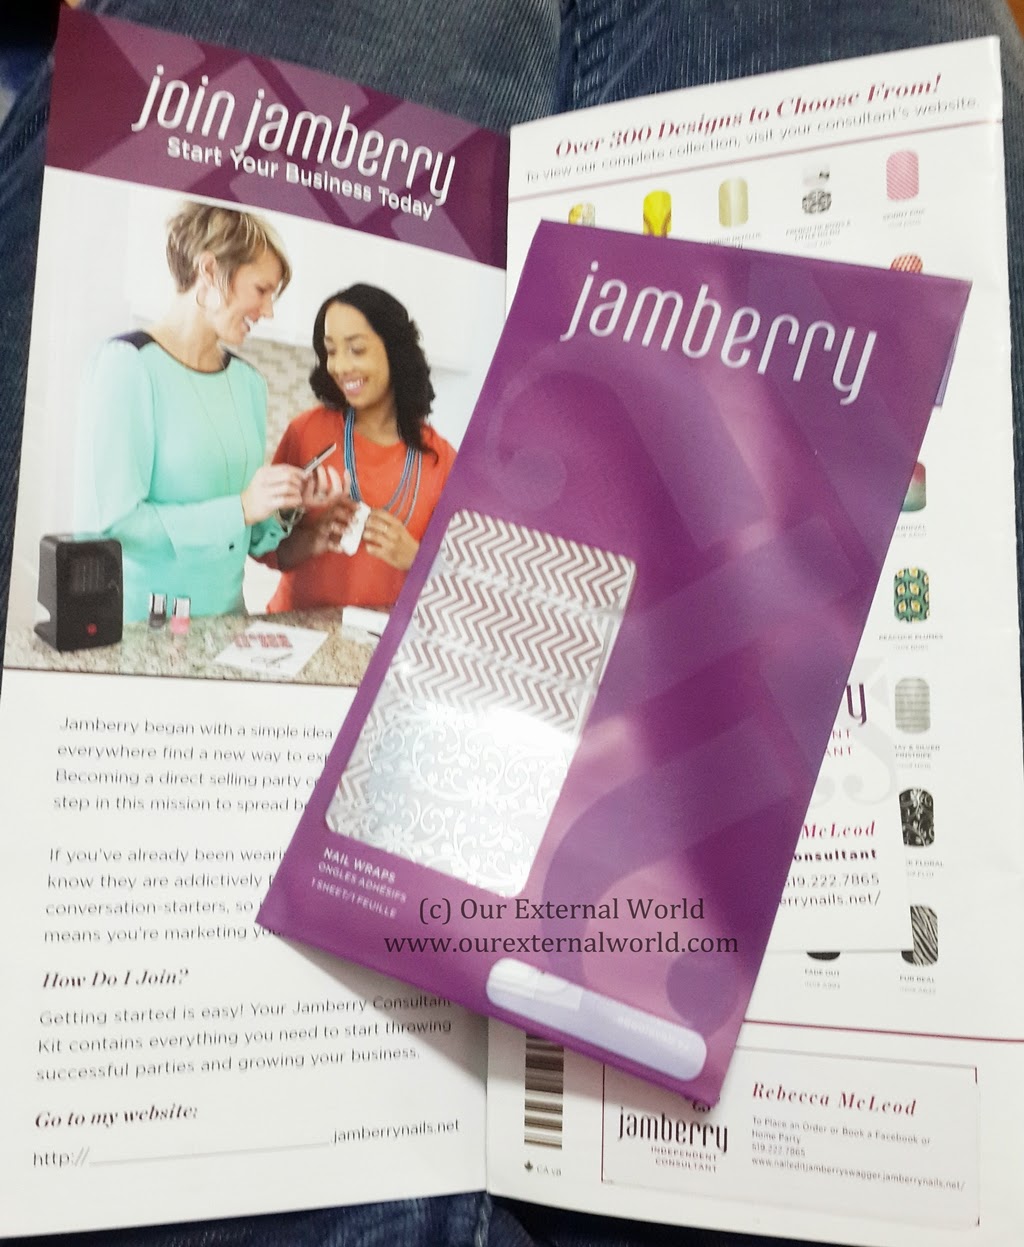
The nail wraps came with a detail instruction on how to join Jamberry to become a consultant along with a lovely purple envelope containing my strip of wraps.

One sheet has 9 wraps and you can cut them in half to use on your hands so one strip is good for both the hands. The nail wraps I got are in the pattern Marsala in Bloom - Marsala is the pantone color of the year so I chose this pattern. The design is a lovely floral pattern. The nail wraps are thin and flexible so its not difficult to cut them or apply them.

These nail wraps unlike most others available are free of odor so if you hate the smell of polish these are for you!

After proper application the nail wraps lasted me around 4 days after which they did start lifting off at the corners. I did not try them on any longer as I remove all my polish on a weekly basis - my nails grow out fast enough anyways. On toe nails these will surely last longer.

Now lets see how are Jamberry nail wraps applied. First of all get your stuff ready.

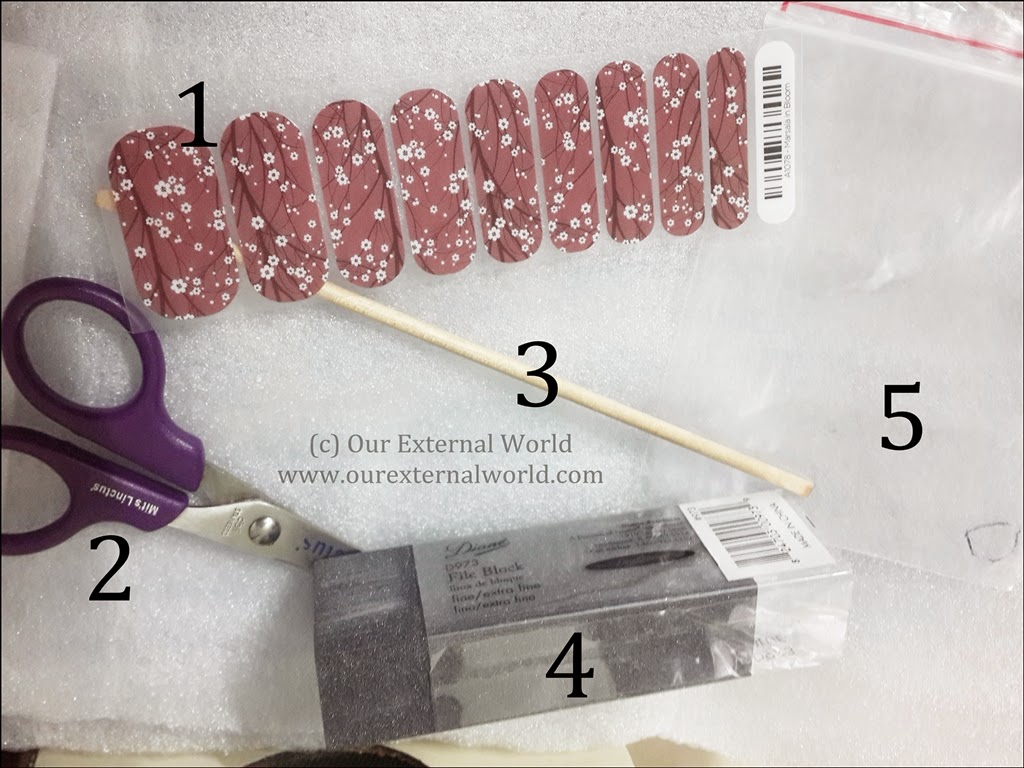
Things you will need:

Jamberry Nail Wraps Marsala In Bloom Review & Tutorial, pantone color of the year
Jamberry Nail Wraps Marsala In Bloom Review & Tutorial

1. Jamberry nail wraps
2. Scissors (preferably the ones which are small with a curved head)
3. Orange stick (you can use a soft rubber cuticle pusher as well - you need a flat surface that does not have sharp edges)
4. Nail file block (any soft nail file will do)
5. A plastic sheet (this is optional but I'll tell you why and how it helped)
6. Hair dryer (not shown in pic) - you can purchase their mini heater but if you don't have that a hair dryer will do

Once you have your supplies ready you are all set to apply these wraps for beautiful looking nails.

How To Apply Nail Wraps


Jamberry Nail Wraps Marsala In Bloom Review & Tutorial, pantone color of the year
Jamberry Nail Wraps Marsala In Bloom Review & Tutorial

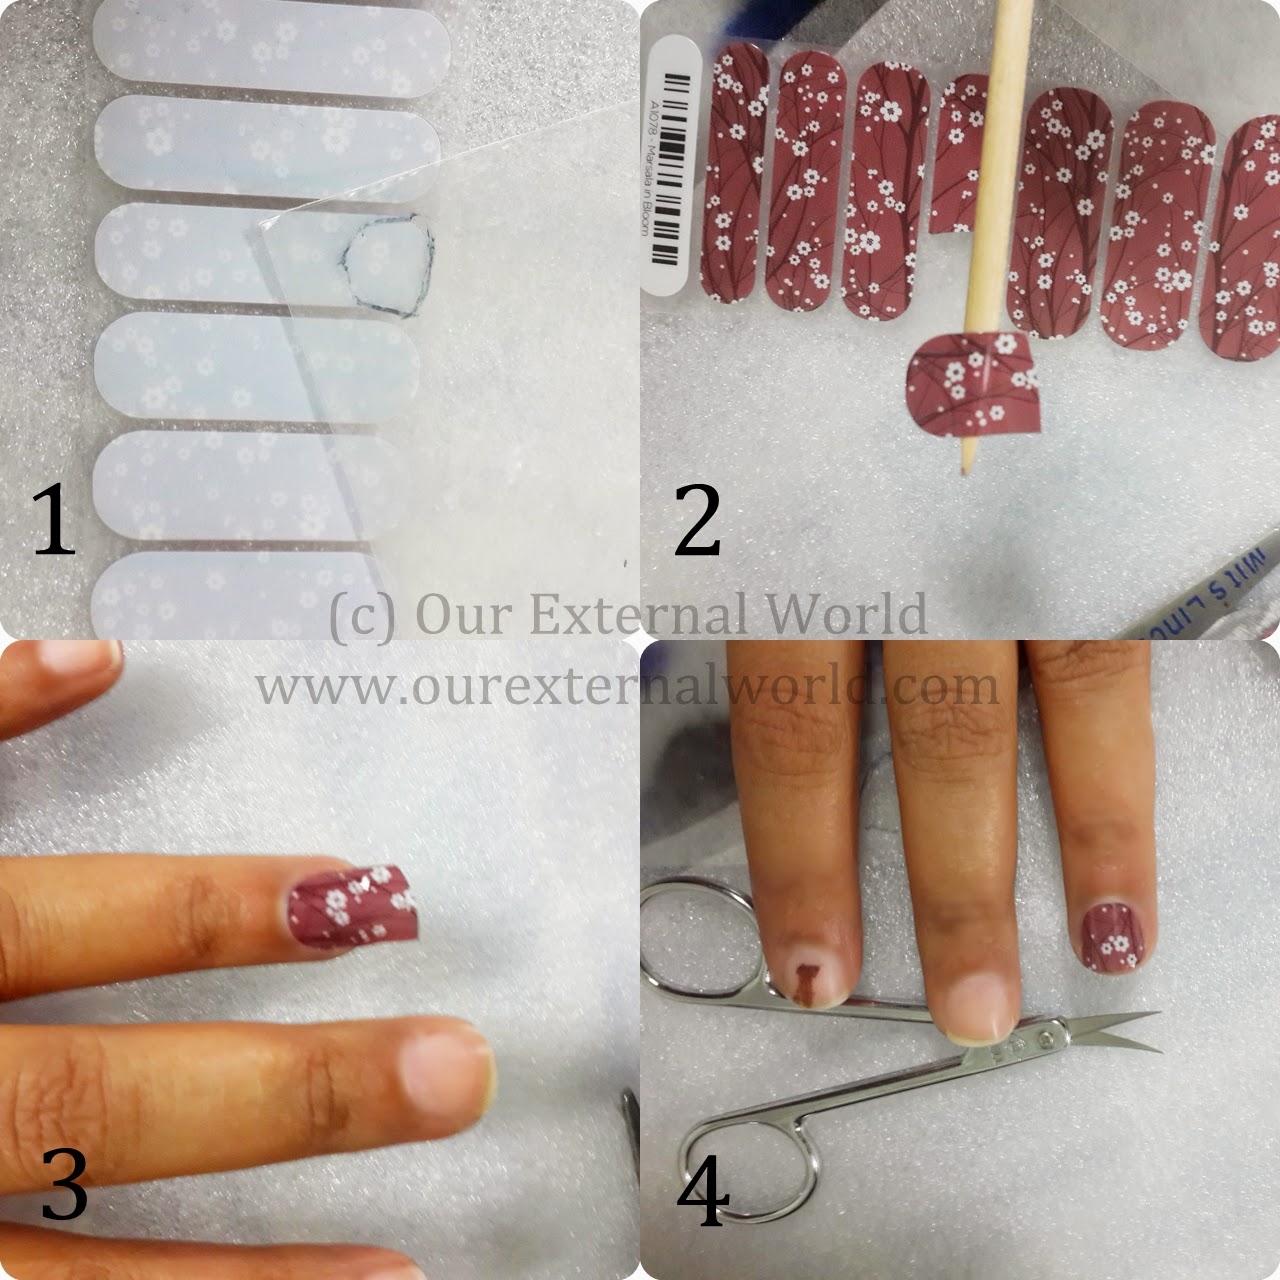
  1. Take the plastic sheet and place it over your nail. Draw the shape of your nail on the plastic sheet. Now place this over the Jamberry nail wrap to match the correct size for your nail. This will ensure that you are using the correct nail strip and also reduce the amount of cutting off that you need to do for a cleaner finish. 
  2. Cut the required size from the strip that is close match to your nail size, the plastic guide will help you decide how much of the strip you need. Now gently lift off the wrap using the help of an orange stick as shown in the picture. Now take a hair dryer and gently blow hot air over the nail wrap. You will notice the nail wrap will become more flexible with the heat. Once you feel its flexible enough that is it will start to curve inwards - mostly a few seconds of heat is enough - you are ready to move to the next step.
  3. Carefully place the nail wrap on your nail. Notice in the picture above I have placed the wrap very close to the cuticle. Once it is in place push it down. Use your fingers to smooth it out. Take the orange stick or soft cuticle pusher to press it firmly on your nail and all along the nail surface.
  4. Now take a scissor or cuticle cutter and clip off the extra edges. This step is very easy if you have already selected the right sized nail wrap hence step 1 is very helpful.
  5. Now take the nail file and at a 90 degree angle just file away the edges until they are smooth. The filing is to be done vertically against the nail edge. 
At any point during the application if you feel the wrap is not properly sticking to your nail bed, use a bit of hot air from your hair dryer and press it back down. If you follow the steps and ensure that your nails are absolutely clean and dry before application then you should get a clean application.

Thursday, March 12, 2015

How To Do Gel Manicure - Madam Glam Gel Polishes, Review and Swatches

Hi everyone! Yesterday we learnt how to setup a UV nail lamp. Today I'm going to tell you the application process for a gel manicure and also show you swatches of Madam Glam Gel polishes that I have.

Gel manicure is normally a salon manicure in which a special procedure is used to apply gel polishes. The whole point of getting a gel manicure done is for the the longevity of the manicure. A gel manicure if done properly can last you over 2 weeks without any chips or fading. For some people it can last even longer. And the polish retains its fresh look during this time.

How To Do Gel Manicure With Soak-Off Gel Polish

1. Clean and dry your hands. 

2. Use a fine nail block to gently buff the surface of your nails. This makes the polish adhere better (I personally did not do this as I don't like buffing the surface of my nails)

3. Use an alcohol wipe to clean the nail surface (I use a wet wipe like Dettol and it works fine for me)

4. Apply a UV base coat - like normal base coats there are special base coats for doing gel manicure. These make sure that the gel polish sticks better to the nail and hence does not come off easily. After applying the base coat cure under the UV nail lamp for 2 minutes (please follow instructions on the base coat - every manufacturer has different instructions and time requirements)

5. Apply a very thin coat of your gel polish and again cure under the UV nail lamp for the time specified by the manufacturer.

6. Apply another thin coat of gel polish and cure under the UV nail lamp (this step is not required if the step 5 gives you the desired color output on your nail)

7. Apply a gel top coat and cure under the UV nail lamp. You might need to clean up what is called as 'tackiness' that is left off during curing. With the gel polishes I have I did not notice this issue.

Note that if you get any polish on the cuticle area or on any part of your skin remove it with acetone based cleaner before curing. After curing it becomes difficult to remove.

Madam Glam Gel Polishes - Review & Swatches

Now coming to the Madam Glam Gel Polishes. These polishes come in dark black bottles with color coded lids. I love the packaging. It is important for gel polish bottles to be kept in a dark place hence the dark bottles - this prevents the polish from spoiling. The color coded lids make it easy for you to search through your stack. The applicator brush is wide enough to give you an even streak free application.
How To Do Gel Manicure - Madam Glam Gel Polishes, Review and Swatches, tutorial
How To Do Gel Manicure - Madam Glam Gel Polishes, Review and Swatches

I have the polishes numbered 142, 289 and 347. 

Wednesday, March 11, 2015

How To Setup A UV Nail Lamp For Gel Manicure

Finally friends after taking so long to post this - here is a post where I will tell you all that I have learnt about Gel Manicures. And the first step for a gel manicure is to setup your UV nail lamp.

I purchased my UV nail lamp online (and if you follow me on Facebook you would know that I ordered two by mistake and am trying to sell of one of these - so yup if you need one leave me a comment so that I know!)

So the UV nail lamp came in a regular cardboard box and it had 4 UV lamps of 9W each. The lamps were packaged individually. The base of the UV Nail Lamp slides out so that you can see the sockets where the UV Lamps are to be inserted. You need to be careful, align the ends properly before gently pushing it inside. Once all the 4 lamps are inserted properly, slide back the base and you are ready to go.

How To Setup A UV Nail Lamp For Gel Manicure, tutorial

Now most gel polishes will clearly mention the duration for which you need to keep your nails under the UV light. Most of these say 2 minutes in a 36W lamp. Notice that the total power of my UV Lamp is 36W (4 x 9W).

As you can see setting this up was simple and easy. Next we will learn about how to actually do a Gel manicure.

This lamp cost me Rs 1400 per piece. In India its available for around Rs 4000. In case you want to purchase the extra one I have let me know.

Follow Me On instagram | facebook | pinterest

Friday, December 12, 2014

Winter Nail Art Tutorial - How To Make A Snowman

Hi friends, finally the Delhi winters have started playing peek-a-boo. The day is still quite hot but the mornings and evenings have started feeling cold. I have taken out my woolens and actual dread the extreme weather. I am a spring person completely (unless its complete snow-capped mountain kind of winters!)

But for all of those out there who not only enjoy winters but wait for it eagerly here is a nail art I did last weekend.

Mr. Snowman has come visiting on my nails!

Winter Nail Art Tutorial - How To Make A Snowman, STNChallenges, sponging, snowflakes, stamping
Winter Nail Art Tutorial - How To Make A Snowman 

As part of a winter challenge for nail art in the STNChallenge group the theme for this week was snowman and so I did this nail art. A few of my friends at work actually noticed and appreciated my work, so yay! It always feel awesome to get appreciation in person. I hope you all will like it too. Do leave your comments to let  me know.


And I also did a quick tutorial for how to make a snowman, step-by-step pictorial to help you create a simple cute looking snowman on your nails.

Winter Nail Art Tutorial - How To Make A Snowman, free hand, dotting, stamping, step by step
Winter Nail Art Tutorial - How To Make A Snowman 

I used two gorgeous polishes for the base, one is from a brand called Envy and the other is from Health & Glow. Both these are only available in Mumbai and my sister got these for me on a trip to the city. These are awesome polishes and cost only Rs 50! How I wish we had such good value-for-money brands in Delhi.

Friday, October 3, 2014

Breast Cancer Awareness Pink Ribbon Nail Art

October is the month of Breast Cancer awareness. This month we unite with only one motto in mind - to spread awareness about breast cancer - to spread the message that early detection can save lives. There are many women out there who have lost their life to this disease. But, there are others who have survived - and the difference is in the awareness they had. So let us join hands in spreading the message of early checkups and regular examinations to prevent this disease.

My little attempt in spreading this awareness is through a mani I did with the symbol of the pink ribbon - Pink Ribbon is a symbol of breast cancer awareness.

Breast Cancer Awareness Pink Ribbon Nail Art, polish decal, DIY, tutorial
Breast Cancer Awareness Pink Ribbon Nail Art

For this mani I used Innisfree polish #2 (reviewed HERE) as the base. I stamped white hearts on all the nails using GE white polish. On the accent finger I used Sally Hansen Confetti Punch 05.

To make the ribbon all you need is any polish of your choice and a soft plastic sheet.

Thursday, October 2, 2014

DIY Mehndi Design (Henna Pattern) Tutorial

Hi friends, its that time of the year again, Durga Puja, Diwali, Bhai Dooj, all festivals are lined up one after the other. And not to forget Karva Chauth.

I had shared a mehndi pattern tutorial on the blog which is the most loved on pinterest (you can see it here) I had thought I would do more such posts but I just realized its almost two years since I did that post, gosh! It is high time I share at least one more DIY mehndi tutorial with you all so that you can try it out one of these days during all the festivity.

I am planning on doing this on my hand on Karva Chauth, my  favorite celebration of love. (All my non-Indian friends you can search the festival names mentioned in this post on google as I don't want to go on ranting about all the goodness that each festival brings)

Coming straight to the tutorial - I saw this amazing henna pattern on instagram (shared by someone from facebook - I think its going around on a lot of social media channels but I have no idea who really owns this image.

I think this neat and simple patterns looks amazing. Just follow the picture tutorial below step by step and you will see it is an easy pattern and all that you need is a steady hand.

So first we begin with the most basic lines that make the pattern going through the center of the hand.

Sunday, September 14, 2014

Whirl About Marble Nail Art - Dry & Wet Marble Nail Art

For the second week of September the theme at STNChallenge is creating a nail art using two different techniques. I had been eyeing a nail art done by @lokadom on instagram. So keeping that as my inspiration I created a nail art where I used dry marble and water marble techniques. Though both are marbling nail art techniques they are very different.

Whirl About Marble Nail Art - Dry & Wet Marble Nail Art

This time I remembered to click a picture of the polishes I used! From left to right - 270 Lacey Lilac from Sally Hansen Extreme Wear, Health & Glow polish called Extravaganze, Envy Polishes Black Onyx and Stardom. Read on to know about how I created these nails.

Saturday, August 9, 2014

Raksha Bandhan Nail Art - 3D Rakhi Nails Tutorial

Hi friends, this is another nail art post specially for Raksha Bandhan. Rakshan Bandhan is a Hindu festival that celebrates the love between brothers and sisters. On this day sisters tie a thread of love and good luck on their brother's wrist. This thread is called the Rakhi. The brother in turn vows to protect his sister. There is a lot of historical significance to this festival (you can read it on wiki-pedia)

The ordinary thread over time has changed many forms - from crystals, to the now popular diamond studded Rakhis - the humble holi thread has had a makeover.

To capture the festivity of this day I tried to recreate a tiny little Rakhi for my nails. I know this might sound a bit crazy but then who wants to be normal! The pictures were all taken when all of my nails were still wet - you can see the wet polish around the accent nail with Rakhi.

Raksha Bandhan Nail Art - 3D Rakhi Nails Tutorial
Things you need:
1. Tiny embelishments for creating the Rakhi - I used green nail studs and one flower crystal stud.
2. A thin thread - I used a golden thread from a ribbon I had - you can use a normal thread and coat it with golden polish
3. Clear top coat
4. Zip lock bag (or any similar plastic bag)

Saturday, July 12, 2014

Cut Out Heart Nail Art Using Maybelline Glitter Mania Red Carpet - Tutorial

In the last post I shared swatches of the Maybelline Color Show Glitter Mania polish Red Carpet (HERE) and it had a sneak peak into a nail art I did using Red Carpet.

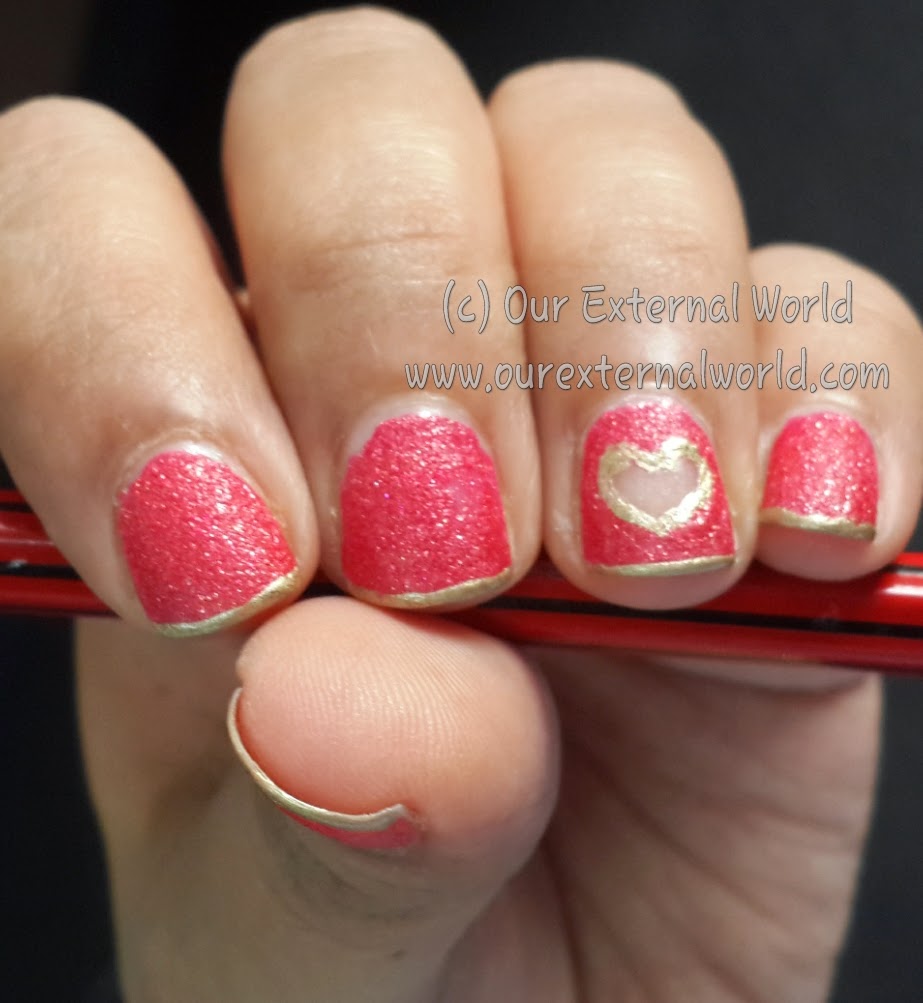
Here is the nail art I did - cut out heart nail art.

Cut Out Heart Nail Art Using Maybelline Glitter Mania Red Carpet - Tutorial

This is really easy to do. So here go the steps. First gather your polish - Red Carpet and Bold Gold both from Maybelline Color Show, scissors, tape/paper, top coat and base coat.

For the tutorial see the image below from top-left corner going in a clockwise direction.

  1. First step is to apply a base coat and let it completely dry.
  2. Use tape or a piece of paper to cut out a tiny little heart. Stick this on your accent nail. If you are using tape then make sure its not very sticky (use scotch tape if possible). I used paper and stuck the heart using a glue stick.
  3. Now use your polish and apply on the accent nail. Once it begins to dry gently lift off the heart using a pair of tweezers (or your nails if you have long nails). Don't worry if the heart is not very neatly drawn
  4. Apply polish to all other nails.
  5. Now use Maybelline Color Show Bold Gold and using a lining brush draw out the heart shape edge on the accent nail. Make sure to cover any glitches that you made in step 3.

Saturday, June 21, 2014

InspiratioNailJune - Ballet Shoes Nail Art

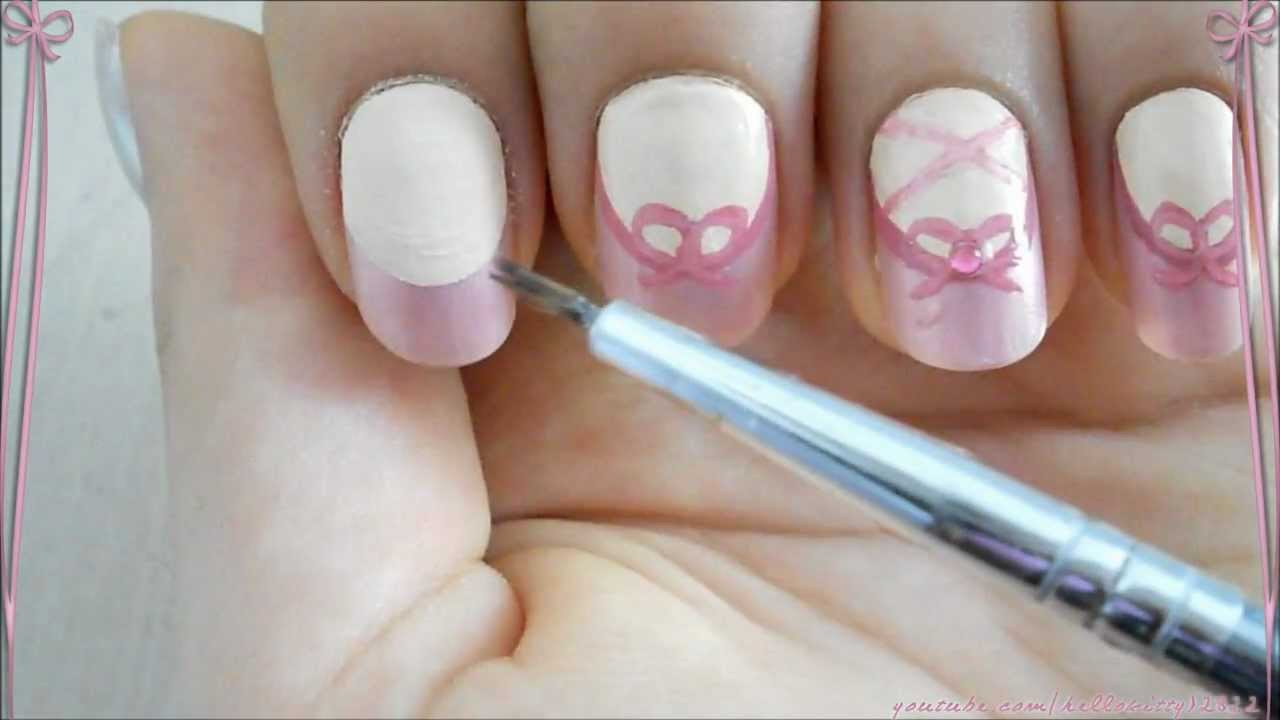
Inspired by "hellokitty12822" on youtube I did these ballet nails which were also reqeuested on my facebook page. So I hope you all like my nails for the third challenge of June for STNChallenges InspiratioNailJune - inspired by another artist.
InspiratioNailJune - Ballet Shoes Nail Art
Here is a pic of the original nail art. I played around a bit and also did a picture tutorial for you all. For the thumb I actually tried a wavy pattern to represent the frills of a ballet skirt.
http://i1.ytimg.com/vi/PJERM-WKF3k/maxresdefault.jpg

Ballet Shoes Nail Art Tutorial

Friday, June 13, 2014

DIY Magnetic Calender

Hi friends, here is a DIY post on the blog after a long time. This one is by a dear friend who readily agreed to share her gorgeous creation with you all. Over to Anuradha!
DIY Magnetic Calender

DIY Magnetic Calender

Hi Girls,well, like me, if you are also bored of the routine paper calendars and wanna have a peppy calendar that suits your style, here is a super-cool DIY – Magnetic Calendar

All you need is an old picture frame, 1-2 magnetic sheet(s), A4 sheet in a color that you wish to use as your base, assorted designer papers, colored tape, adhesive letters & numbers, marker, ruler, pen knife, glue & a cutting mat.

For creating numbers, day/month names you can use variety of things – flat-base glass marbles, chipboard pieces, bottle caps etc. Basically anything that you can fit in your square boxes. I used compressed foam sheets which were available in different colors.

Steps-
  1. Let’s begin with resizing the magnetic sheet according to the picture frame using cutting mat, cutting knife & ruler. The magnetic sheet should completely fit inside the frame. My magnetic sheet completely fit the frame so I didn’t need any resizing.
  2. Create boxes on A4 sheet using marker & ruler to accommodate weekdays, month name & dates. I created a 7X6 matrix of 3cmx3cm each & left space on top for month name.
  3. Place the sheet on top of your magnetic sheet & fit it in frame. My frame looked like this –
DIY Magnetic Calender

Sunday, April 20, 2014

Summer Nail Art - Sea Creatures - With Tutorial

I finally captured pictures at different steps of doing my free hand nail art as requested by a lot of you. I hope you like it! Today's nail art is another one part of the Summer Nail Art series and the topic is Sea Creatures.

Summer Nail Art - Sea Creatures - With Tutorial


Summer Nail Art - Sea Creatures - With Tutorial
First lets take a look at the base. I used Maybelline Color Show Blueberry Ice (403) as the base. Once it dried up I used the GQ Professional Nail Color in White and number 310 from Tenno Color. Both GQ and Tenno are local Delhi based nail polish brands (that is what the shopkeeper told me - have never heard or seen these before but I liked the quality and bought a few of these).

Friday, April 18, 2014

Summer Nails - A Day At The Beach

This time for the #stnchallenges the theme for Summer Nail Art is "A Day At The Beach". I have some fond memories of times I've spent at a beach and the ones I cherish the most are the ones from Maldives. The pristine beaches, the gorgeous blue sea, and the calm all around. And so my nail art was an attempt to reminisce those times.

Summer Nails - A Day At The Beach


I used Maybelline Color Show Cool Blue on the entire nail (just did one coat) and then used sponging technique using Cool Blue and Bold Gold (Maybelline Color Show) on all the nails.

HOW TO Summer Nails - A Day At The Beach
Summer Nails - A Day At The Beach
Then I used my MoYou London Stamping Plate Suki Collection 04, picked out random wave pattern type images and stamped using a local white polish mixed with a local deep blue polish. The polishes were mixed on the image itself so that the wave would get a random hint of blue when I swiped off the polish using the scraper. On the accent finger I have actually done dual stamping (two different patterns stamped over one another)

Tuesday, April 8, 2014

Summer Nail Art - Mango Nails Tutorial

The third theme for the Stnchallenge is summer fruits - and my favorite summer fruit is the MANGO!!!! I love juicy sweet mangoes and till I wait for the sweetest mangoes to arrive in the stores I decided to do a mango based nail art.

Summer Nail Art - Mango Nails Tutorial


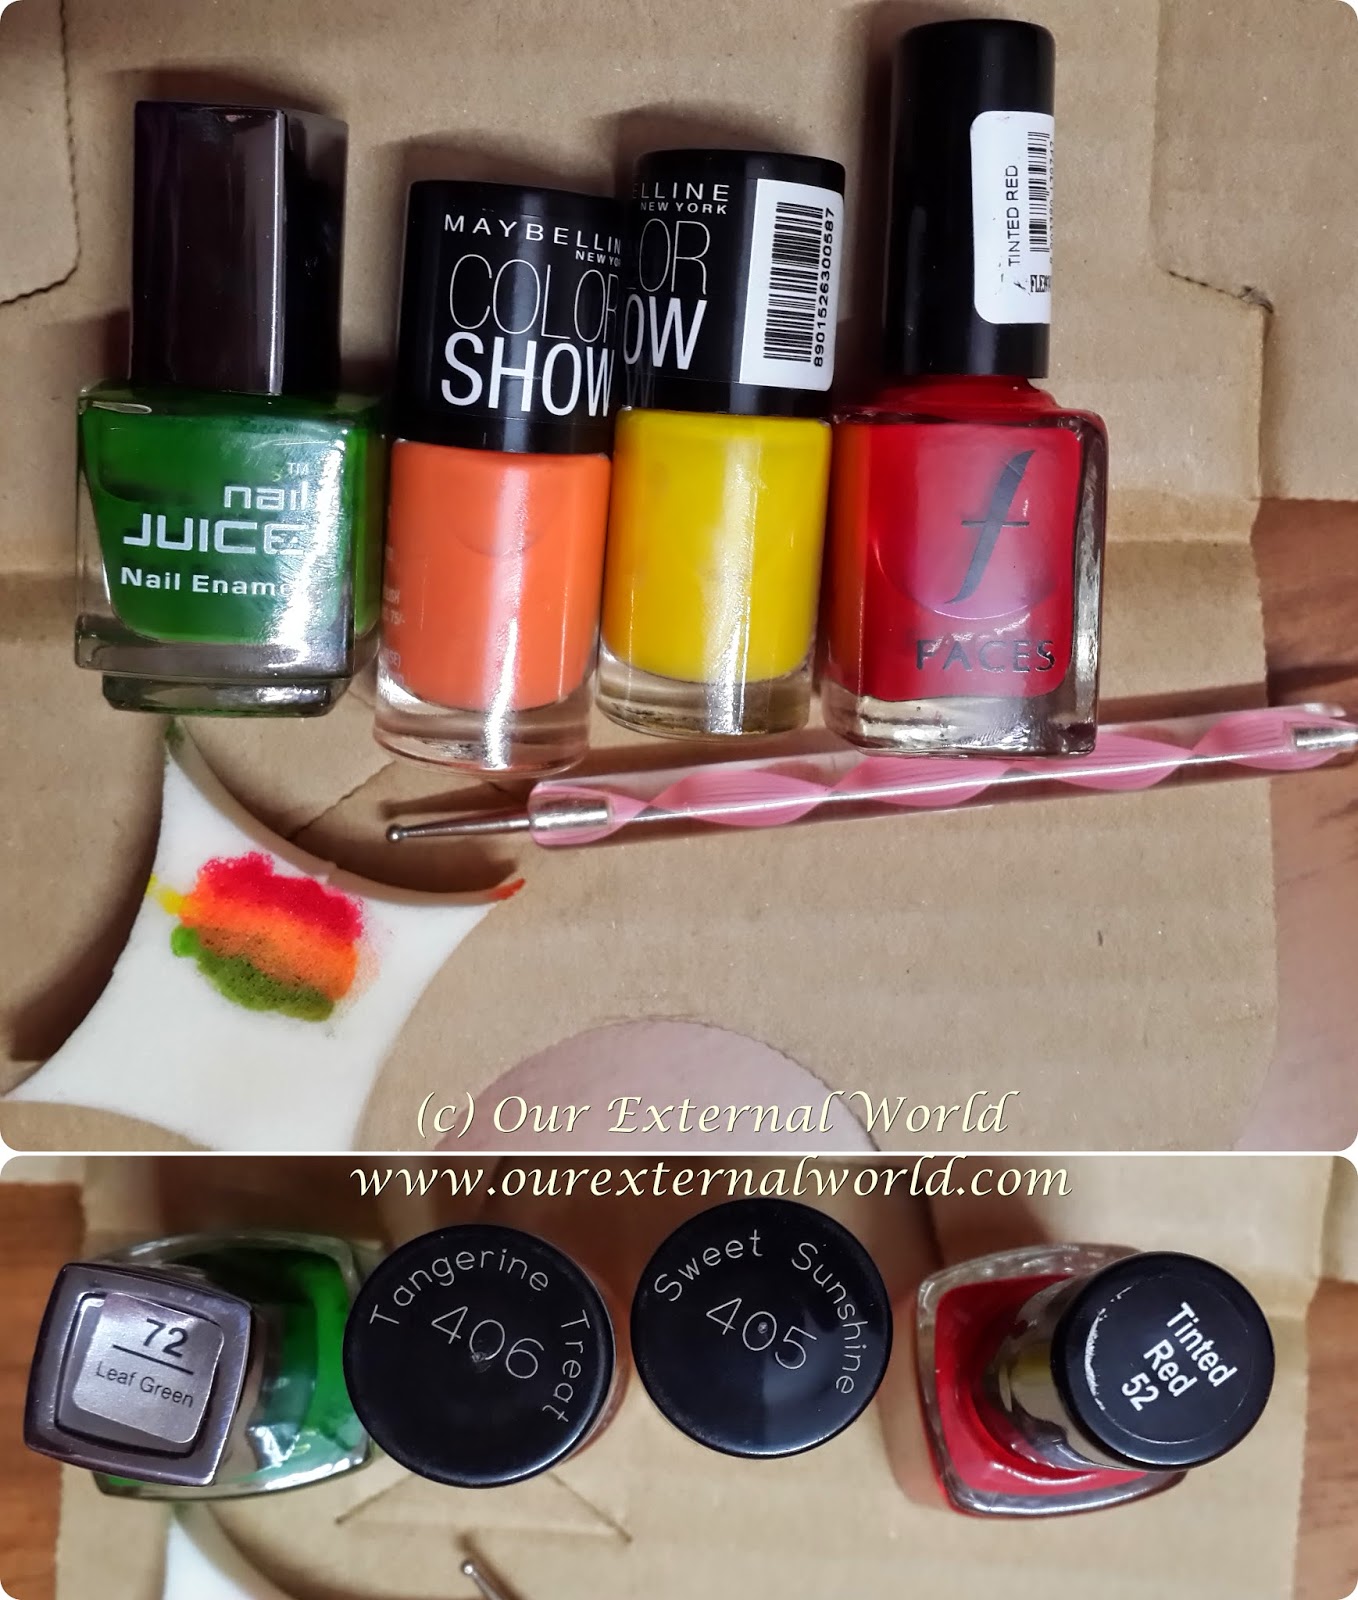
I used four nail paints for this nail art, a sponge and a dotting tool to mix the colors. Here are the materials required.
Summer Nail Art - Mango Nails Tutorial

I used Leaf Green from Juice Nails, Tangerine Treat and Sweet Sunshine from Maybelline Colorshow and Tinted Red from Faces. The sponge I used is a makeup sponge. 

Tuesday, April 1, 2014

Welcome Back Summers - Chevron And Lines Nail Art Tutorial

Today I'm sharing a nail art which I've done to welcome summers as part of the STNChallenge. This nail art is also part of my Illchallenge where the theme is chevron and lines. Yes here I go again trying to do two things in one go.

Welcome Back Summers - Chevron And Lines Nail Art
Please excuse my super dry cuticles - they aren't dry in person but don't know why they look like this in the pictures :(

I've chosen lovely pink colors because summers are the time when all my lovely pink dresses come out of the closet. The base is Diana of London Nail Paint shade City Glamor (check the link for proper swatches), then I used China Glaze Fifth Avenue for the inner chevron and Lakme Lavender Lush for the outer chevron and ring finger. Flowers are done using Lavender Lush and everything white and green is acrylics.
Welcome Back Summers - Chevron And Lines Nail Art

And to add to the summer feel I've added tiny flowers on two nails. This time I've done a tutorial as well so I hope you all enjoy it.

Sunday, March 16, 2014

Holi Hai - Holi Nail Art - Splatter Colors (With Tutorial)

I had so much fun creating this nail art - splatter color nail art for Holi. For my non-Indian friends, Holi is a festival of colors celebrated across India to mark the beinning of spring. People play with colors drenching each other so much that by the end of the day its hard to recognize who-is-who. You can read more about Holi and its significance HERE.

Holi Hai - Holi Nail Art - Splatter Colors (With Tutorial)
My nail art today is an attempt to showcase the use of color on Holi. I have used a splatter technique which basically involves the use of an old tooth brush and some acrylic paints. You can substitute acrylics with polish but I find using acrylics much more easier.

Holi Hai - Holi Nail Art - Splatter Colors (With Tutorial)

Friday, February 14, 2014

Striping Tape Mani - Valentine's Day Special (Tutorial)

Here is a quick nail art you can do on Valentine's day - you can swap the colors I used with a combo of red and white or red and black. Striping tape is a thin tape that is available at nail art supply stores. I will explain the basic steps for beginners (this is my first try with striping tape!)
Striping Tape Mani - Valentine's Day Special

1. Begin by painting your nails in the color you want to show up when you remove the tape. I alternated with a teal and a brown shade as a base. Let this dry completely.

linkwithin