Our External World - Indian Makeup Beauty Fashion Travel
Showing posts with label lakme 9 to 5. Show all posts

Sunday, September 2, 2018

Lakmé 9 to 5 Naturale Matte Sticks - Blush Site Review and Swatches

I must be like the last blogger reviewing this product. I've just been missing from the action scene lately. Another one of my, "better late than never" posts!
I'm going to share my views on the (new) Lakmé 9 to 5 Naturale Matte Sticks that have been launched by Lakmé under the umbrella of products containing the goodness of Aloe Vera.

Lakme Matte Sticks Review


The Matte Sticks are long crayon sticks that come in a very nice metallic packaging with a gradient effect of soft green and rose pink. It looks classy and interesting. These are retractable which means the bottom part of the stick is twistable so you don't waste product by sharpening it.

Lakmé’s 9 to 5 matte sticks’ collection boasts of aloe vera and honey to heal and soften the lips. It's sad that the brand has not listed the ingredients anywhere, neither on the outer box in which this product comes nor on their website.

The texture is semi matte, it glides on smoothly like a creamy crayon but gives a matte finish to the lips. You will notice a hint of shimmer but nothing that looks gary.

Lakmé Matte Sticks with Aloe Vera


The lipstick is transfer proof and although a lot of people claim that this lasts a good 5 hours, my experience is that with one heavy meal it is gone.
The good part is that the lipstick feels weightless  on the lips so you can easily go back and reapply. It can exaggerate any dryness of your lips so make sure to use this over well exfoliated lips. The first time I tried this over chapped lips (to test the moisturising properties) it looked horrible to say the least.

Price: Rs 451 (2.2 g) available online [ launched at a price of Rs 550 ]

Tuesday, August 5, 2014

White Dress Inspired Nail Art

Just wanted to quickly share a nail art I did recently from a white colored pretty dress called Ivory Day Dress (from a website modcloth)

The dress is very elegant so I decided to go with a pearly base for my nails.
I used Lakme 9 to 5 nail polish White Book (reviewed and swatched HERE) as the pearly base.

White Dress Inspired Nail Art

On top I used a local brown metallic polish to stamp delicate lace patterns on the nails.

I hope you like this - for more such updates do follow me on instagram. And let me know if such small nail art update posts are helpful and inspire you to try something of your own.

Modcloth has a blog where they share more such ideas you can check HERE

Follow Me On instagram | facebook | pinterest

*PS: This is not a sponsored post

Tuesday, April 1, 2014

Welcome Back Summers - Chevron And Lines Nail Art Tutorial

Today I'm sharing a nail art which I've done to welcome summers as part of the STNChallenge. This nail art is also part of my Illchallenge where the theme is chevron and lines. Yes here I go again trying to do two things in one go.

Welcome Back Summers - Chevron And Lines Nail Art
Please excuse my super dry cuticles - they aren't dry in person but don't know why they look like this in the pictures :(

I've chosen lovely pink colors because summers are the time when all my lovely pink dresses come out of the closet. The base is Diana of London Nail Paint shade City Glamor (check the link for proper swatches), then I used China Glaze Fifth Avenue for the inner chevron and Lakme Lavender Lush for the outer chevron and ring finger. Flowers are done using Lavender Lush and everything white and green is acrylics.
Welcome Back Summers - Chevron And Lines Nail Art

And to add to the summer feel I've added tiny flowers on two nails. This time I've done a tutorial as well so I hope you all enjoy it.

Sunday, October 13, 2013

Lakme Skin Stylist Kit & Lakme CC Cream FOTD

Is this post late? Very late? Very very late? Oh yes its late indeed. I got this kit from Lakme as a prize for a contest held on Neisha's blog.
Lakme Skin Stylist Kit & Lakme CC Cream FOTD
The kit contains the Lakme Iconic Kajal, Lakme CC cream, Lakme 9-to-5 nail paint (reviewed & swatched HERE), Lakme 9-to-5 lipstick in shade Beige Post (reviewed HERE), an eyeshadow quartet, and a liquid liner in blue.


I was supposed to do a look using products from the kit. I did a simple everyday look and followed it up with how you could convert that easily into an evening look. Neisha liked the evening look and put that up on her blog.

This is what I did for a simple daytime look - good for office or college.

Monday, September 30, 2013

Lakme 9 to 5 Lipstick Beige Post (MB10) - Review and Swatches

Today I'm sharing with you a lipstick from the Lakme 9 to 5 range. The color is called Beige Post (MB10).
Lakme 9 to 5 Lipstick Beige Post (MB10) - Review and Swatches
Lakme 9 to 5 lipsticks come in a  pink gold packaging which looks really classy. The lipstick is matte and the company claims it to have a staying power of your entire work day.
Lakme 9 to 5 Lipstick Beige Post (MB10) - Review and Swatches

About Lakme 9 to 5 Lipsticks

"Lakme Nine to Five brings you a range of shades that sit on your lips all day long. Enriched with Vitamin E; it conditions your lips & softens them with wheat germ oil. So, perk those soft, smooth lips with a touch of matte."

How to Apply

Step 1: Stretch the lips and start at the center, putting on the lipstick to the corners.
Step 2: Blot the lipstick with a tissue. Make sure the lipstick has not smudged over the line of your lips

Sunday, September 22, 2013

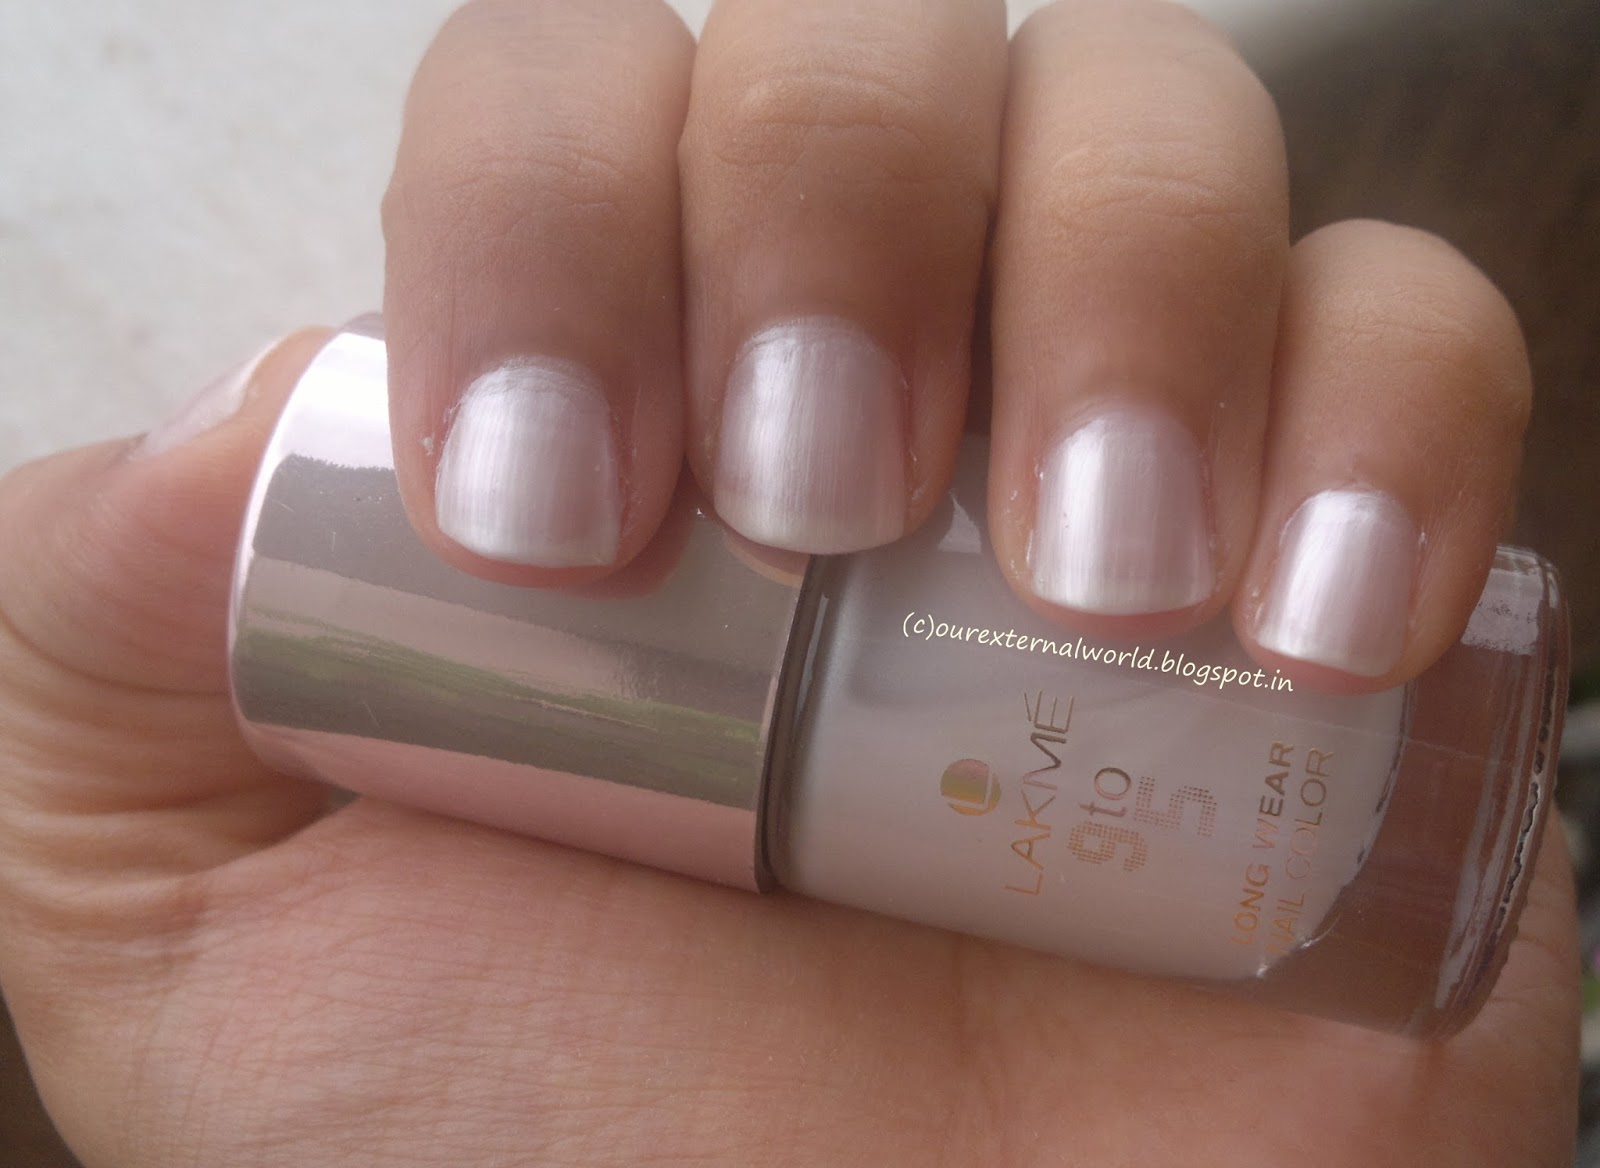
Lakme 9-to-5 Long Wear Nail Color - White Book - Swatches

As part of the Lakme Styling Kit (which I still haven't blogged about) I got this lovely nail paint - its called White Book - I think the name is really interesting and stands out. This nail paint is part of the Lakme 9-to-5 range.

Lakme 9-to-5 Long Wear Nail Color - White Book - Swatches
My first reaction to this was that it won't suit my skin tone but I actually loved it. The 9-to-5 nail paint comes in a glass bottle with a beige gold cap and a thick applicator brush. I like the applicator because two straight strokes cover my entire nail. Two coats of this nail paint give an opaque look. The photos have me wearing a single coat.

Lakme 9-to-5 Long Wear Nail Color - White Book - Swatches

Wednesday, May 2, 2012

Lakme 9 to 5 Longwear Nail Color - Lavender Lush - Review

I hope you all liked my sponging nail attempt - today I am reviewing one of the nail paints I used for that nail art technique. It is from the Lakme 9 to 5 range and the shade is called Lavender Lush.
Lakme 9 to 5 Longwear nail color Lavender Lush

As you can see in the image above it comes in a glass bottle with a lovely golden beige cap. There are no ingredients mentioned and the back label simply suggests how to apply the nail paint. Apply two coats followed by a top coat.
Lakme 9 to 5 Longwear nail color Lavender Lush

This nail paint is nice and dark so applied in a single coat works just as well - the only thing is that if you don't want it to fade away too soon its best to apply two coats - gives a nice satin finish as well.

Here in the swatch I have applied a single coat. As you can see its not see through. 
Lakme 9 to 5 Longwear nail color Lavender Lush swatch

Lakme 9 to 5 Longwear nail color Lavender Lush swatch
I was in a hurry so did not apply it very well but you can see that it gives a nice touch to my sponging nail art below
Sponging nail art - Lakme lavender lush

Now for my take on this nail paint - firstly the color - I love it - I think its a very sophisticated shade yet its fun and not boring. Its a versatile color that can go with a lot of outfits. The quality of the nail is good - its easy to apply and gives a very smooth satin finish. The only problem I have which is mainly because I tend to skip the top coat, is that it does not last for more than 2 days - it starts to chip away. I have had better experiences with other company nail paints so this is surely a drawback for me. But I think I will mostly use it for doing nail art whenever I want to and on its own I would use it only for special occasions where its ok if the nail paint wears off after two days.

Details at a glance
Packaging       : good quality
Pigmentation : highly pigmented
Fragrance        : none
Staying power: 2 days without top coat
Price              : Rs. 195

What I like:
1.The colour
2. Satin Finish

What I don't like:
1. Value for money - its on the more expensive side for a nail paint yet staying power is not as I would expect

Monday, April 30, 2012

Sponging Nail Art - Soft Pink - tutorial

The only way to decorate my nails was to apply direct nail paint. Then I played a little with mixing two colors in different patterns. Later I advanced to drawing patterns using a brush or toothpicks. More recently I started dabbling with stamping. I had never heard of sponging as a nail art technique until I saw some posts on stylecraze. So I googled and found this interesting tutorial on nail art using sponging

It looked so pretty I thought of trying out something similar. The steps seemed simple so I went ahead. First a look at the finished nails.

Sponge nail art - stamping - the complete look

Now for the steps - I started with a small sponge piece. The sponge was only big enough to cover my thumb. I like having control over the thing I am holding so I made sure it wasn't too big. Next I took white nail paint and put some on the sponge using the nail paint brush.

Then I gently sponged it all over my nails. To cover all fingers of one hand I had to apply nail paint twice to the sponge. The more depth of color you need the more sponging you will have to do. Also if you use a sponge with very fine holes then the look of the paint on your nails will be denser.

Sponge nail art - first coat of white

As you can see in the picture above I did not care about the extra paint going outside my nails. That can be cleaned off later.

Once the white color dryed (which was very quick due to low density of paint) I repeated the process with a pink colored nail paint (lotus cozy mulberry). This time I started sponging a little downwards from the nail bed - this makes the white visible as you can see in the picture below.

Sponge nail art - second coat of pink

 The final step was to use a darker shade of pink (Lakme 9 to 5 ) This was sponged only on the tips of the nails. I used a Q-tip - dipped it in nail polish remover and cleaned the sides of the nails with it.
Sponge nail art - tips


Then I gave the complete nails a layer of top coat. When it dried out I used my stamping kit to stamp on snowflake like flowers to alternate nails starting with the thumb. I finished off by putting random dots using a toothpick. Stamping and dots were done using the same white nail paint that I used for sponging.

Sponge nail art - stamping

A final layer of top coat and I was done.

Sponge nail art - stamping - final look

Sponge nail art - stamping - with flashSponge nail art - stamping - the complete look


 And here is a picture of the sponge piece that I used.

Sponge nail art - the sponge

Nail paints used:
1. Lotus Herbals Color Dew Pure White (81)
2. Lotus Herbals Color Dew Cozy Mulberry (94)
3. Lakme 9 to 5 Lavender lush
4. Top coat - Lakme clear glass

I hope you like the above step by step description for this very easy method. I know a lot of you out there are experts at this technique - please do give suggestions on how to I can improve this next time onwards.

linkwithin