Our External World - Indian Makeup Beauty Fashion Travel
Showing posts with label nails. Show all posts

Saturday, January 20, 2018

NYX Advanced Salon Formula Nail Polish - Review and Swatches

Hi everyone! Today's post is a quick swatch post about a gorgeous polish that was lying in my stash. Every month I participate in a birthday collab where the group creates some mani for the birthday girl. This month I was supposed to recreate the mani of one of the birthday girls and I was looking for a pink polish that was bright yet a soft pink. I have a few popping pink colors but couldn't remember having this beautiful pink polish from NYX that I got a couple of years ago.

NYX Advanced Salon Formula Nail Polish - Review and Swatches
NYX Advanced Salon Formula Nail Polish - Review and Swatches - NPS 227

The polish doesn't have a name and is numbered as NPS 227. The pink shade is like the traditional rose pink color with hints of magenta shimmer. It sort of gives it a slight holo effect.

Monday, December 25, 2017

Merry Christmas !

Hello everyone! Hope you all are enjoying yourself during the last week of the year!

If you have holidays during this time go out and make the most of them. For those of you who are still working, hopefully the workload is lighter than normal.

Merry Christmas

I created this simple Christmas nail art which I call The Pink Christmas!
I used Cici & Sisi Christmas stamping plate, Innisfree Eco Nail Color Pro 2 nail polish, and KB Shimmer Green Hex Glam glitter polish to create the tree.
Do take good care of your health and relax whenever you find the time to.

Let me know if you have some Christmas plans in the comments below!

Merry Christmas!!!!

Follow Me On Instagram | | Pin It

Thursday, November 2, 2017

How I Got 4 MyGlamm Gel Finish Nail Polishes For Rs 45 Each!

Does the title of this post sound crazy? Well wait till you hear about how I snagged this awesome deal.

If you are following my posts on Instagram you would know that I was eyeing to get my hands on the MyGlamm Two-of-your-kind polish duos. And in the October anniversary edition of MyEnvyBox I got a MyGlamm voucher worth Rs 500. So this is where the craziness started.

How I Got 4 MyGlamm Gel Finish Nail Polishes For Rs 45 Each!

I say craziness because I myself couldn't believe that a polish duo costing Rs 390 on MyGlamm would end up costing me only Rs 90! Yes that is true, and I really wanted to share my excitement with you all. If you've got yourself the October box then great, if not see if you can still get your hands on one simply for the Rs 500 voucher it contains. You can check out myenvybox.com and see if the anniversary box is still available.

For those of you who have that voucher - read on!

Saturday, September 9, 2017

Step By Step Frog Nail Art Tutorial

Today's post is a cute little nail art tutorial done by Vriddhi who is an amazing nail artist. Her choice of patterns and color combinations is always beautiful.

Let's get started and learn how to draw a frog on your nails!

Step By Step Frog Nail Art Tutorial


Things you will need:
Products Needed for frog nail art

1. Base Coat [used Luron base coat]
2. Nail polish - soft brown (or whatever background you choose for your frog) [used Luron nail polish, tips & toes 111]
3. Acrylic Paint (if you don't have acrylic paint, you can use nail polish mixed with a little acetone to thin it out)
4. Top Coat
5. Dotting tool (you can use the back of a toothpick if you don't have these)
6. Nail art brush (you can use a 0 number paint brush if you don't have a nail art brush)
Optional: Cuticle oil, quick dry top coat

Apply base coat to keep your nails looking healthy and to protect them from any chemicals in your nail polish. Base coat also helps your nail polish/nail art stay longer.


Step 1. We will create the silhouette of the frog's body

Wednesday, December 28, 2016

Temix Mini Nail Polishes Swatched

Hello everyone! Hope the festive cheer is keeping you all happy. Today's post is a quick review and swatch post of my recent nail polish acquisition! (Sounds like a huge treasure I've just acquired - but that's how polish addicts are!)

Temix Mini Nail Polishes - brown, neutral, pale blue, green, red
Temix Mini Nail Polishes Swatched

Temix nail polishes set that I got is a mix of  neutrals and brights.
There are 5 mini bottles of polish  6 ml each. 

Temix Mini Nail Polishes Swatched


The set of polishes is called the Temix Top Ten but the box actually consists of 5 bottles. The Temix polishes do not have individual names. The shades are a 
  • deep coffee brown with a gray undertone. 
  • soft neutral with a pink undertone
  • pale blue with a gray undertone
  • green with an olive undertone
  • a cool toned red

Monday, August 29, 2016

Nail Art Using Revlon Matte Nail Polishes and Ejiubas Nail Vinyls

After many days of bare nails I finally decided to do some basic nail art. Revlon has recently launched pretty shades of nail enamels in a matte range which I wanted to try out and I also got a pack of nail vinyls from Ejiubas so I really had no reason to keep my nails bare anymore.

Before I show the nail art I tried let me share a bit about the polishes and nail vinyls.

Revlon matte nail paints come in cute matte bottles which gives them a dreamy look. The good thing about matte polishes is that you sort of have two finishes in one bottle - well technically it is a matte polish, but all it takes to transform it into a glossy finish is your regular top coat.

Nail Art Using Revlon Matte Nail Polishes and Ejiubas Nail Vinyls
Revlon Matte Nail Polishes

The shades I picked out are Sunny Matte, Cool Matte and Marine Matte.

Sunny Matte - 528 - is a lovely creamy yellow.
Cool Matte - 527 - is a blue polish
Marine Matte - 529 - is a sea green coloured polish.

Each polish is priced at Rs 190 for 8ml - currently there is a sale on Flipkart HERE where you can get that at 20% off (so yes, this is the time to collect all shades that you want to try out!)

Wednesday, July 6, 2016

Casino Nail Art

If you follow me on social media you must have already seen these. I thought I'll post my Casino Nail Art here on the blog as well.

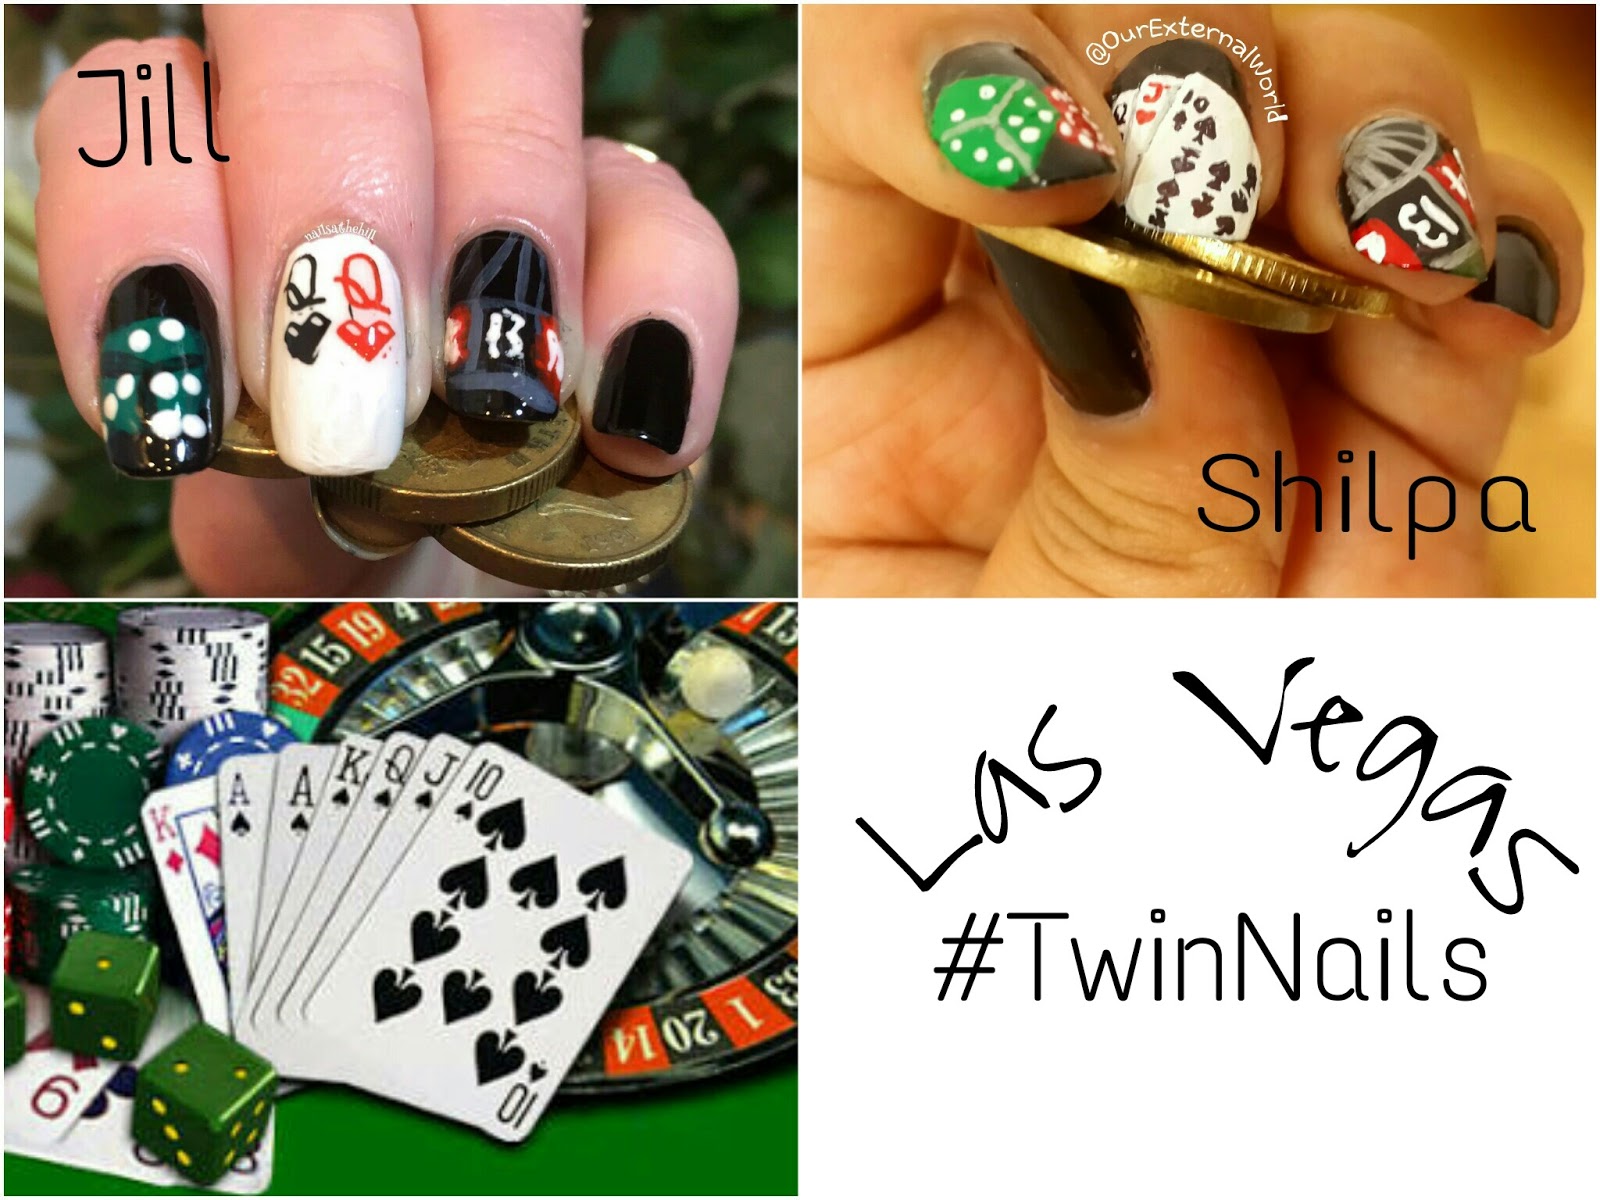
As part of my Twin Nails challenge at Those Nails Though Facebook group, I got paired with Jill Cowton. The theme was Las Vegas and when its Vegas you cannot leave behind the casinos!

Here is what we came up with. We decided to capture different elements of a casino on each nail. Going with our inspirational image we added some dice, playing cards, and a roulette.

casino nails, Las Vegas, roulette

The complete nail art was done free hand using polish, some acrylic paints and a fine brush. I hope you like what I did with my nails.

Friday, June 24, 2016

HPB Presents Strawberry Nail Art

This month's HPB linkup them is fruits. Finally I thought I should do Strawberry Nail Art.

I have wanted to try this nail art since a long time but always kept putting it off. It is easy do to and all you need are the following:

1. Red nail polish (I used Be Mine from the FACES Love Struck Collection)
2. Green nail polish (from Oriflame)
3. Dotting tool

HPB Presents Strawberry Nail Art

The process is simple. Coat your nail with red polish completely and let it dry. Then add a heavy coat of red polish. 

When it is almost dry take a dotting tool and simple press on gently all over the polishes to create little holes. The base red polish will ensure that the places you press on with the dotting tool appear like little grooves on the strawberry fruit.

If the little dents are not very visible you can dip your dotting tool in a brown or green polish and then use it for the dotting action. It adds a bit of depth as well.

Thursday, June 23, 2016

FACES Love Struck and Cocktail Collection Review & Swatches

FACES Love Struck and Cocktail Collection Review & Swatches

FACES has launched two sets of nail polishes as complementary collections - Love Struck & Cocktail.

These collections contain 3 polishes of 6ml each. Each collection is created so that you can create easy nail art your self using the colors in the collection.


FACES Love Struck Nail Lacquer Collection

The love struck collection has the perfect colors for Valentine's day nail art. There are two cream polishes and one crelly.

FACES Love Struck and Cocktail Collection Review & Swatches
Love Struck Collection
The colors in the Love Struck collection are
1. First Date - this is a beautiful deep pink shade. It has a high gloss finish and goes opaque in two coats. 
2. Day Dream - this is pale pink crelly with hexagonal red glitter and tiny white glitter. With three coats you can use it on its own. You can also use it as a topper over other polishes with a single coat.
3. Be Mine - This is a bright red with a pink undertone, reminds me of strawberries.

FACES Love Struck Collection Swatches


FACES Love Struck Collection


I did a water marble nail art using the three polishes. Using a crelly for water marble can be quite tricky but thankfully the final result was fine.
water marble nail art using FACES Love Struck Collection
Water Marble Nail Art

Monday, June 20, 2016

D.I.Y. Nail Polish Remover Jar

You might have seen this DIY in a lot of places. I had seen it long back but never took the time to make it. But when I finally did, I enjoyed it so much that I had to share it here.

We are going to make a DIY nail polish remover jar. A lot of these are available over the counter from Bourjois, ColorBar, and Sephora. But its fun to do it yourself!

Things you will need:
1. An empty jar - plastic with a wide mouth screw cap
2. Sponge (take one which doesn't dissolve with acetone or your polish remover)
3. Any nail polish remover

D.I.Y. Nail Polish Remover Jar
D.I.Y. Nail Polish Remover Jar - Things Required

To make sure your sponge will work, take a small piece and dip it in your polish remover. Then leave it for some time preferably in a closed container. Wet it a couple of times to make sure that you have tested it enough. The first time I made mine, the sponge actually started dissolving with the polish remover after a few hours and so I had to do it all over again!


D.I.Y. Nail Polish Remover Jar

The process is extremely easy. Take a sponge piece that is the same height as your jar. I used an old face scrub jar. The sponge was also a leftover from some packaging that I had opened. 

Now roll the sponge as shown in the picture below. You need the sponge to sit snuggly inside the jar and have a tight centre opening where you can place your finger. Tightly rolling a piece of sponge works well.

Friday, June 17, 2016

The Body Shop Colour Crush And Other Polish Swatches

This is a quick post for you guys while you wait for me to put up the pictures from my recent trip.

I have swatches of two polishes from The Body Shop - Color Crush range. The first one is a beautiful teal blue shade called Minty Amour.

I have used Maybelline Color Show Blueberry Bombshell on the accent nail on top of the Minty Amour. 

The Body Shop Colour Crush And Other Polish Swatches, Minty Amour, Blueberry Bombshell
The Body Shop Colour Crush And Other Polish Swatches

The next polish is a rich plum called Deeply In Love. The is a lovely shade for Indian skin tones and quite perfect for wedding as well.

For this one I used Pastel Dots which is a glitter topper from H&M. It has hexagonal particles in pale pink and white along with tiny circular black glitter.

The Body Shop Colour Crush And Other Polish Swatches, Deeply In Love, Pastel Dots from H&M
The Body Shop Colour Crush And Other Polish Swatches

The Body Shop Color Crush polishes are opaque and do not chip easily. These are vegan, 5-free polishes.

I haven't yet seen these in stores in India but you can find these in UK for £5.00 for 6.8 mL

Have you tried any of the color crush polishes?

Follow Me On instagram | facebook | pinterest

Tuesday, May 24, 2016

HPB Presents Sugar Spun Neutrals And Neons

Hi friends! Here is a quick and simple nail art to brighten up your week!

It finally rained and even though the weather is still hot, the rain was a welcome breather! The theme for Hobby Polish Bloggers for them month of May is Neutrals and Neons. And the technique challenge at Those Nails Though was sugar spun nails.

As always I decided to club two tasks into one and came up with Neon Sugar Spun Nails.

If you want to find out about Sugar Spun Nail Art technique then you should check out my post Girly Girl Nail Art Challenge

And here you go, the nail art I did this time.

HPB Presents Sugar Spun Neutrals And Neons, nail art,
HPB Presents Sugar Spun Neutrals And Neons

I have one more pic which was taken indoors. I love this neon green by Madam Glam. Its just so in-your-face neon!

The pink is Elephantine Pink by O.P.I.

Monday, May 23, 2016

Cannes 2016 - Sonam Kapoor's Saree Inspired Nail Art

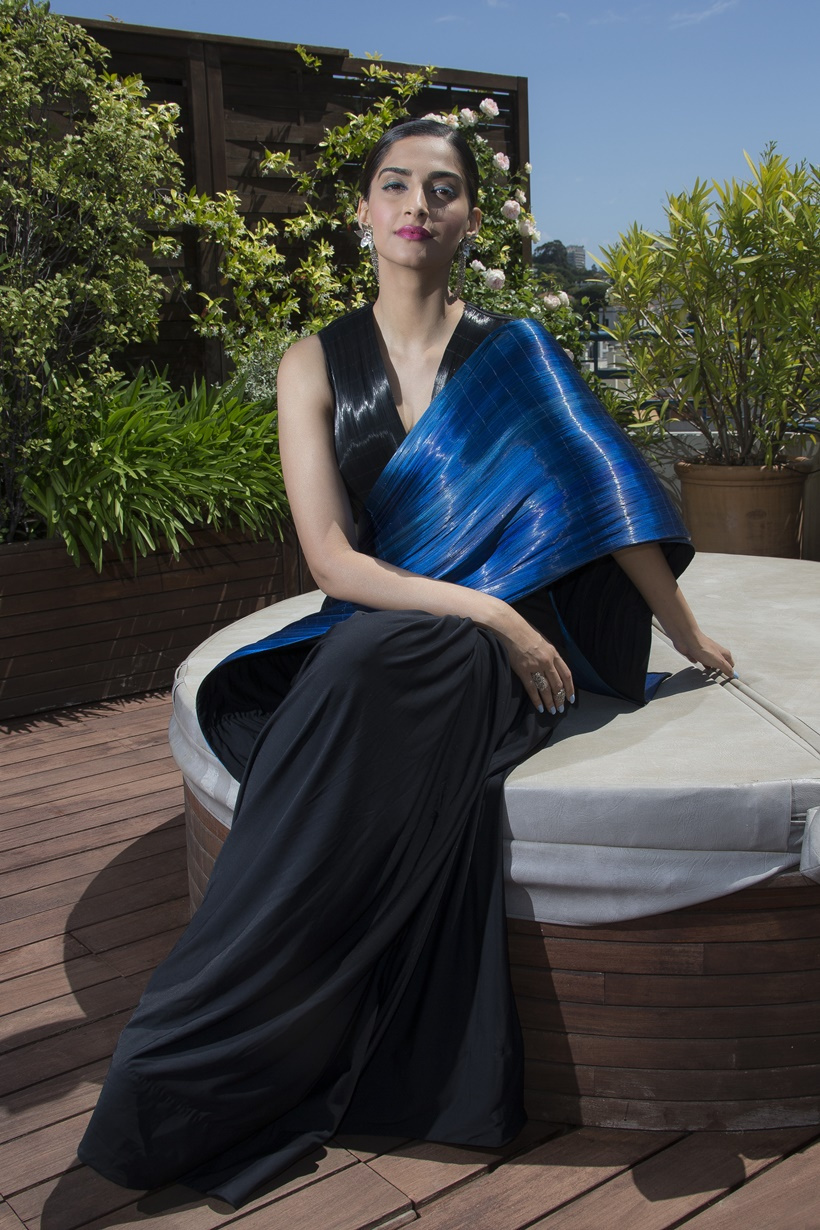
This year when Sonam Kapoor made her first appearance at a press conference in Cannes she decided to wear a saree by Rimzim Dadu.

Rimzim Dadu is a designer who showcased a lot of new textures and materials at the Amazon India Fashion Week this year.

The saree that Sonam donned was quite interesting in terms of texture.

Cannes 2016 - Sonam Kapoor's Saree Inspired Nail Art, Rimzim Dadu,
Cannes 2016 - Sonam Kapoor's RimZim Dadu Saree


A stark black flowy fabric teamed with a shiny blue pallu that almost looked as if it was metallic due to the way the different tones of blue where interplayed.

When I saw this pic of Sonam Kapoor it just inspired me to do nail art keeping the same color scheme in mind.

Sunday, May 15, 2016

How To Do 3D Donut Nail Art

Hi everyone! This month's twin nail challenge (check the earlier ones I took part in at the end of this post) at Those Nails Though Facebook group was themed desserts. AND, I was paired with the super talented free hand nail artist Anita from StyleThoseNails.

Anu, as I lovingly call her, is amazing with her nails. She does some breathtaking free hand nail art (check out her instagram channel @stylethosenails). This time she wanted to try out 3D nail art and suggested we pick donuts as our nail art. I was sure she would do something amazing and sheepishly agreed to take up the challenge myself.

This is what I came up with.
How To Do 3D Donut Nail Art, Dessert nails, donut nails
How To Do 3D Donut Nail Art

And here is a look at both of our versions.
How To Do 3D Donut Nail Art, #tnttwinnails, bestie twin nails
How To Do 3D Donut Nail Art

Anu used breakfast loops to create the donuts on her nails and has a full video on her channel. I, on the other hand, could not think of what came in loops and would fit my nails. I looked around, even dug into the nut bolt collection lying around the house but in vain. Finally an idea struck - I thought how about I create little loop structures with something myself. I have this little bottle of fabric glue that I decided to try out. I drew tiny loops on my nail art mat and left it to dry over night. Next day the loops actually dried out and I was able to lift them off. So finally I had something that would fit my nails and looked like loops. 

Wednesday, April 27, 2016

Diagonal Gradient Nail Art

 Hi guys! Today I have another nail art post for you all. This time its for a dual challenge.

I had to do a diagonal gradient technique challenge for #tnttech (part of the Those Nails Though group on Facebook) as well as the #tnttwinnails challenge. So since I'm super lazy I decided to combine both the challenges in one nail art.

As part of the Twin Nails Challenge I got paired with Krystal Moore (@queenofnails83 on instagram) She is one of the admins at Those Nails Though and is the one responsible for inspiring me to get back to nail art with her fun challenges!

 The technique challenge was to do a diagonal gradient. And the twin nail challenge was to replicate a nail art done by your partner. So here is the nail art that I did this week.

Diagonal Gradient Nail Art, tnttech, tnttwinnails, those nails though, stamping nail art
Diagonal Gradient Nail Art

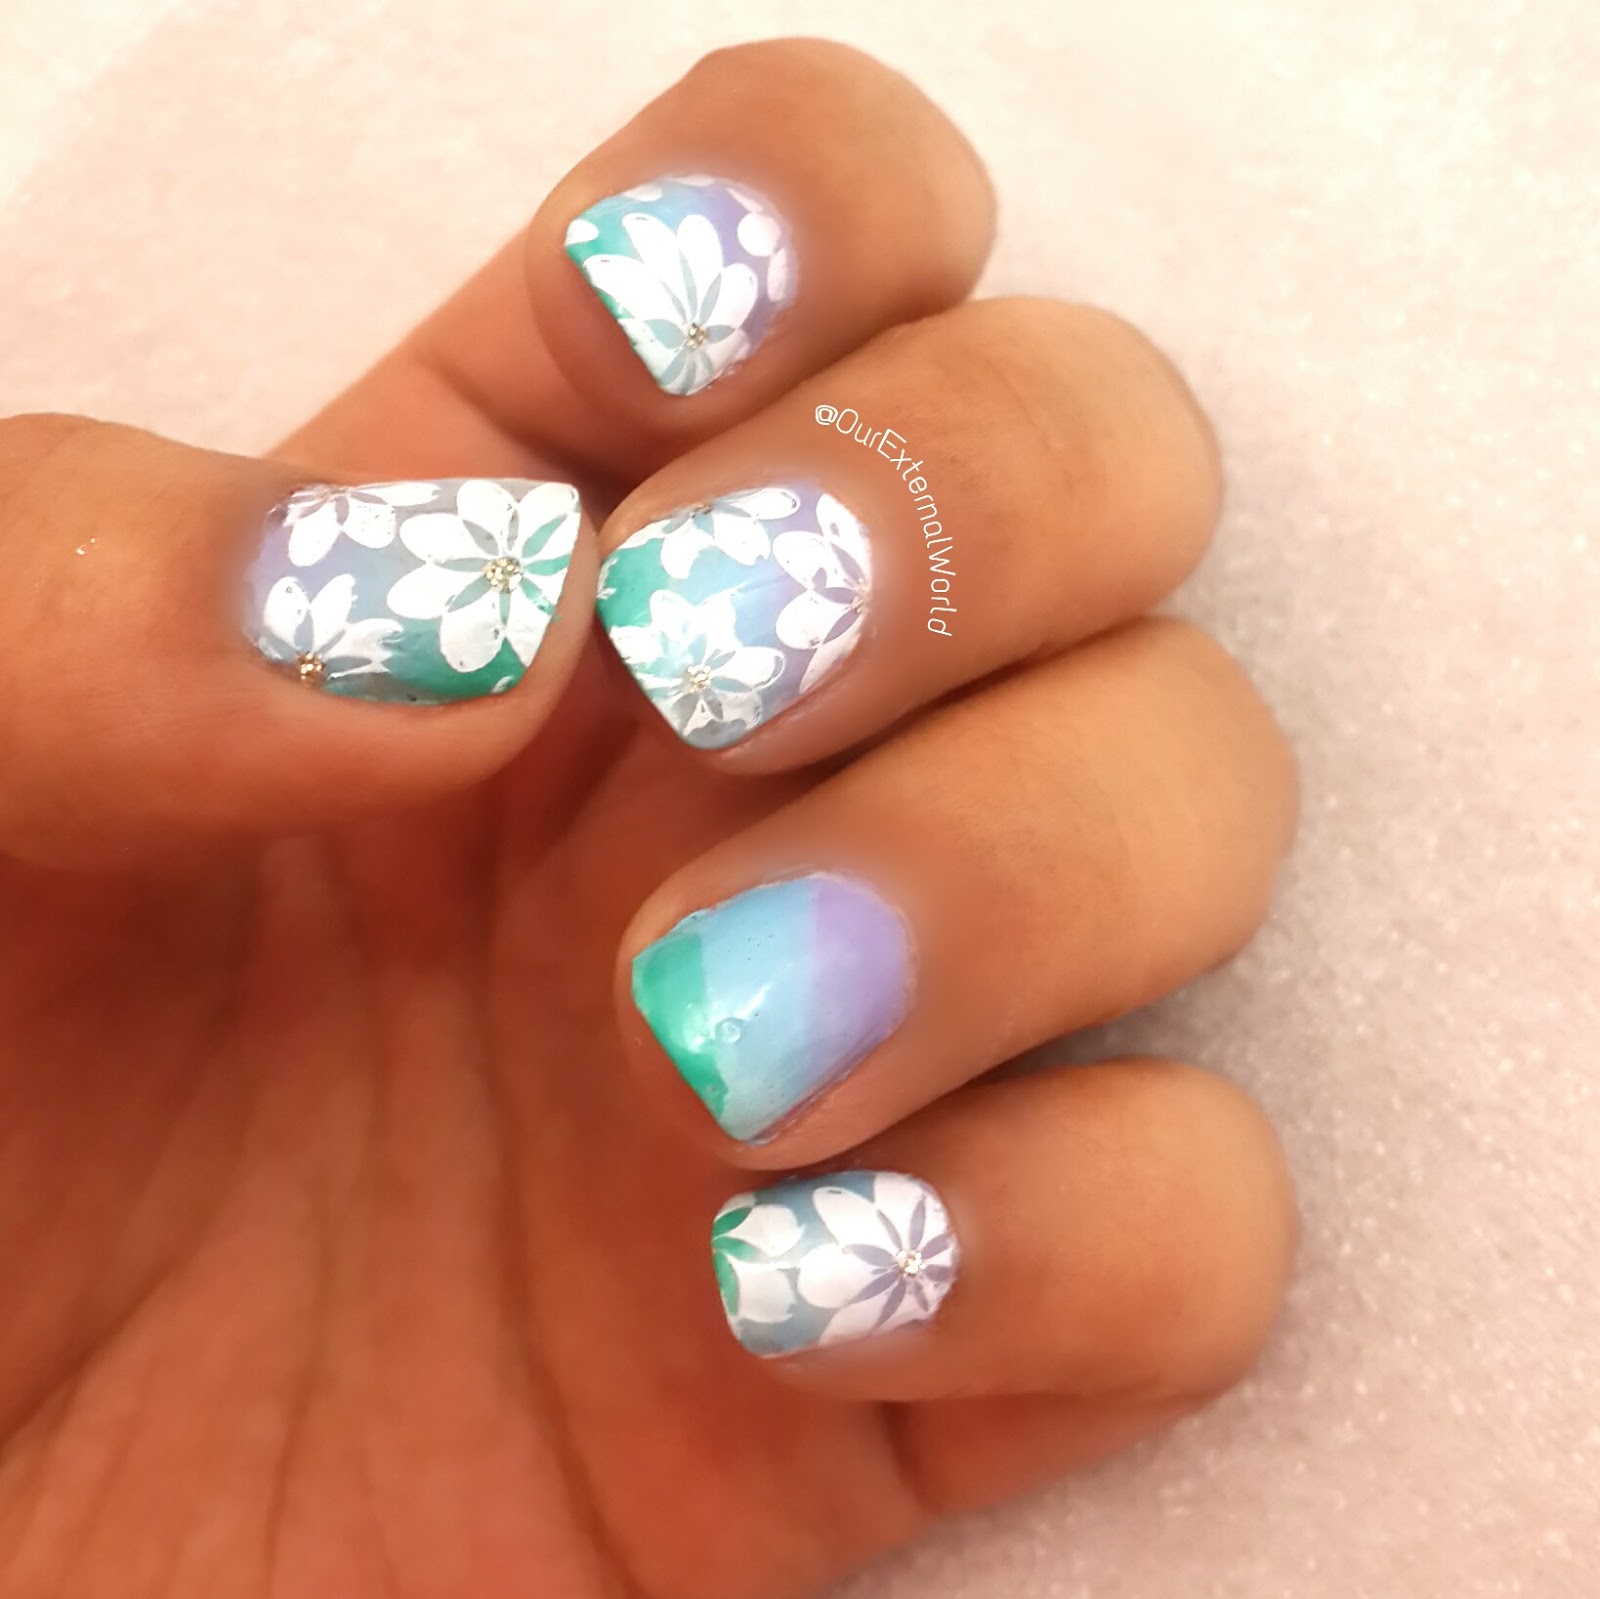
The base was created using sponging with 3 different polishes. To create a diagonal gradient all you have to do is sponge the nail in a diagonal manner instead of horizontally. I used two color show polishes and one local polish in teal.

Wednesday, April 20, 2016

Twin Nails Challenge - Dragon Fruit Nail Art

After what seems like ages I finally have some nail art on the blog. I'm part of a nail art enthusiastic group on Facebook called Those Nails Though. This group came up with a twin nails challenge and the theme was fruits.

I was paired up with Xochitl Ayala who is famous on Instagram as gurlynailz - Xochitl does amazing nail art. I love her immaculately well kept nails and her eye-catching nail art. Do visit her on instagram to see her amazing nails.

So Xochitl showed me a few pictures that we could use as inspiration - and a picture of the Dragon Fruit caught my attention. Such bright colors that I instantly agreed to it. We decided on a rough sketch of how we will do the mani and left the rest to our imagination.

So the first picture is my attempt at this mani. I have captured the cut portion of the fruit on all nails except the accent finger where I wanted to add the bright green touch. I created little dry marbled decals to give a sort of 3D effect but they just stuck to my nails so there is no 3D effect anymore but I like how it looks merged into the base color.

Take a look!
#TNTTwinNails Dragon Fruit Nail Art
Twin Nails Challenge - Dragon Fruit Nail Art

The polishes I used are:
Maybelline  ColorShow Hooked On Pink
Maybelline ColorShow Sunshine Yellow
Madam Glam Neon
A local black and white polish

Now Xochitl did the same basic design but a more neater version and I just love her long nails! You can tell that she is a seasoned nail artist!
Twin Nails Challenge - Dragon Fruit Nail Art, gurlynailz
Twin Nails Challenge - Dragon Fruit Nail Art


Overall I had fun doing this challenge. I have made so many friends from across the globe where we have connected due to nail art. And Xochitl is a really nice girl I've come to know through this #tnttwinnails challenge.

Sunday, February 28, 2016

Bri Polishes - Gold Rush, Silver Sand, Blush - Swatches

Pink and glitter work so well together, totally girly and blingy!

I have three polishes from Love Bri Products to share with you girls. They are Gold Rush, Silver Sand, and Blush. I enjoy using these polishes because they are 5 free.

Bri Polishes - Gold Rush, Silver Sand, Blush - Swatches

Gold Rush and Silver Sand are glitter polishes while Blush is a cream polish.
Bri Polishes - Gold Rush, Silver Sand, Blush - Swatches


The glitter polishes are full of tiny glitter in a clear base. You need at least 3 coats if you want to cover your nail. With a single coat you can use them both as glitter toppers over any polish of your choice.

Monday, January 4, 2016

Sally Hansen Triple Shine Polish - Play Koi 240 - Swatches

If you are looking for a bright orange red nail polish that shines bright then read on!

Sally Hansen Triple Shine nail paints are high gloss nail paints that come in a huge range of colors. The nail paint comes in a uniquely shaped long bottle with a large cap. The cap comes off to reveal the applicator with its own black handle. 

Play Koi is a bright orange red polish. It is not very opaque and needs 3 coats to give the full finish. The nail polish is extremely high gloss.  The polish does not chip and remains glossy for an entire week (maybe even beyond!)

Saturday, January 2, 2016

Parrot Polish Key Lime Swatches

Hi friends, sharing a swatch post of a neon polish that can brighten up any dull day. Key Lime is a bright neon green polish from Parrot Polish. It comes in a cute bottle with the signature parrot logo. 

Parrot Polish Key Lime Swatches, nails blog
Parrot Polish Key Lime Swatches

The polish is creamy textured and requires two coats to go opaque. Available at www.parrotpolish.com

Price: $12 (USD)

Enjoy the swatches and do visit the website where you can find many other gorgeous polishes made by the husband wife duo who are bird lovers to the core!

Friday, January 1, 2016

UberChic Beauty XL Stampers - Review

UberChic Beauty stamping plates changed the way I looked at stamping as a nail art technique. And when I came across the XL Stampers from the same brand it amped up my stamping skill to a whole new level!


UberChic Beauty XL Stampers - Review, Nail Art Blog
UberChic Beauty XL Stampers - Review

The XL Stampers from UberChic Beauty are non-sticky stampers. One set came with a single metallic holder and two stamper heads. They come packed in a cute little metallic box along with a flexible plastic scraper that works great to scrape off excess polish from the stamping plates. The stamper head pack contains one dark grey stamper head, useful when stamping with lighter color polishes. And, the other is white so that you can clearly see the designs when stamping with darker nail polishes.

The stamper heads do not need any priming and can be used straight out of the box.

The UberChic Beauty XL stampers are so squishy that I enjoy the whole process of stamping. The stamped designs come off clean from the stamper without leaving any residue. But this is not it, the best part is that cleaning these stamper heads in-between stamping of different nails is so darn easy! All you have to do is roll over the stamper on a piece of paper and any left over pattern of the stamped design comes off clean. I am so thrilled that I no longer need to worry about cleaning the stamper head in between different nails. It save me so much time!

Price: USD 11

linkwithin