Our External World - Indian Makeup Beauty Fashion Travel
Showing posts with label nail art tutorial. Show all posts

Saturday, September 9, 2017

Step By Step Frog Nail Art Tutorial

Today's post is a cute little nail art tutorial done by Vriddhi who is an amazing nail artist. Her choice of patterns and color combinations is always beautiful.

Let's get started and learn how to draw a frog on your nails!

Step By Step Frog Nail Art Tutorial


Things you will need:
Products Needed for frog nail art

1. Base Coat [used Luron base coat]
2. Nail polish - soft brown (or whatever background you choose for your frog) [used Luron nail polish, tips & toes 111]
3. Acrylic Paint (if you don't have acrylic paint, you can use nail polish mixed with a little acetone to thin it out)
4. Top Coat
5. Dotting tool (you can use the back of a toothpick if you don't have these)
6. Nail art brush (you can use a 0 number paint brush if you don't have a nail art brush)
Optional: Cuticle oil, quick dry top coat

Apply base coat to keep your nails looking healthy and to protect them from any chemicals in your nail polish. Base coat also helps your nail polish/nail art stay longer.


Step 1. We will create the silhouette of the frog's body

Saturday, July 12, 2014

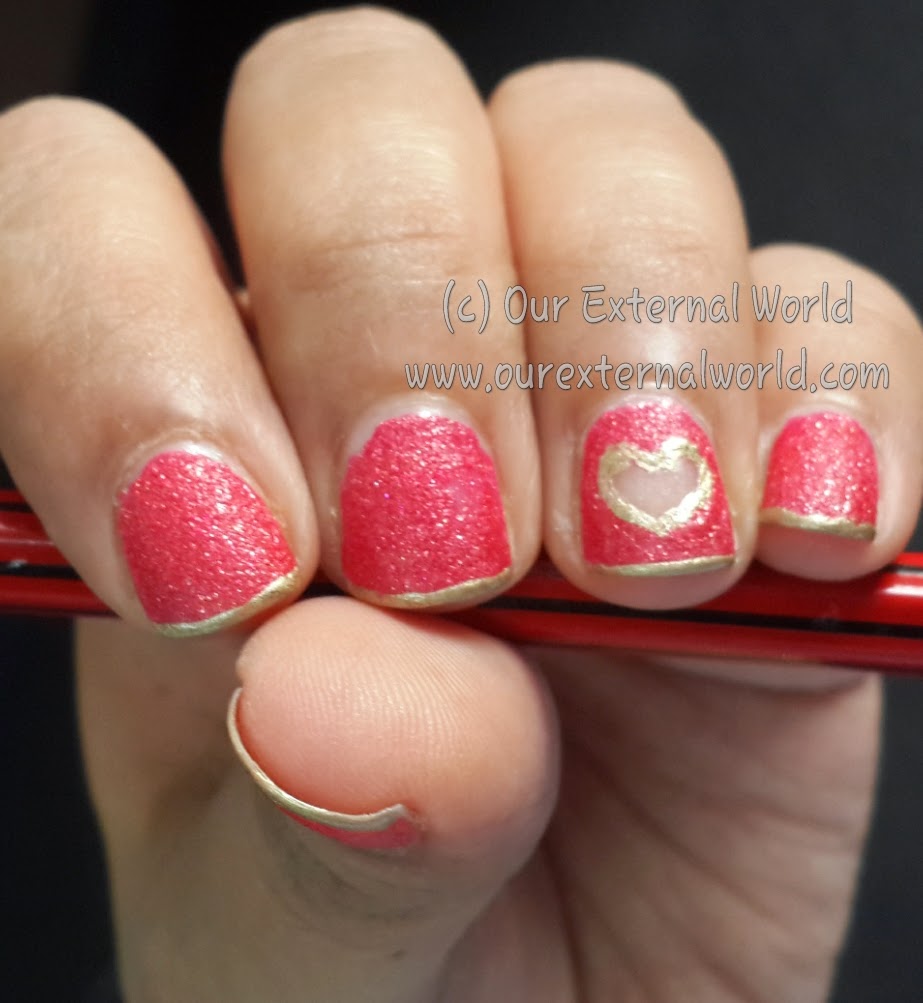
Cut Out Heart Nail Art Using Maybelline Glitter Mania Red Carpet - Tutorial

In the last post I shared swatches of the Maybelline Color Show Glitter Mania polish Red Carpet (HERE) and it had a sneak peak into a nail art I did using Red Carpet.

Here is the nail art I did - cut out heart nail art.

Cut Out Heart Nail Art Using Maybelline Glitter Mania Red Carpet - Tutorial

This is really easy to do. So here go the steps. First gather your polish - Red Carpet and Bold Gold both from Maybelline Color Show, scissors, tape/paper, top coat and base coat.

For the tutorial see the image below from top-left corner going in a clockwise direction.

  1. First step is to apply a base coat and let it completely dry.
  2. Use tape or a piece of paper to cut out a tiny little heart. Stick this on your accent nail. If you are using tape then make sure its not very sticky (use scotch tape if possible). I used paper and stuck the heart using a glue stick.
  3. Now use your polish and apply on the accent nail. Once it begins to dry gently lift off the heart using a pair of tweezers (or your nails if you have long nails). Don't worry if the heart is not very neatly drawn
  4. Apply polish to all other nails.
  5. Now use Maybelline Color Show Bold Gold and using a lining brush draw out the heart shape edge on the accent nail. Make sure to cover any glitches that you made in step 3.

Tuesday, February 4, 2014

Valentine's Nail Art Tutorial - Lady Bug Hearts

hi friends, today I'm sharing a nail art tutorial after a very long time. My nails are really short and I just didn't have the  mindset of doing any nail art but finally dragged myself of doing a cute nail art for Valentines day. I hope you find this tutorial useful.

I wanted to participate in a nail art challenge where the theme was animal print and all that came to my mind was leopard prints or giraffe prints. So then I decided I'll instead  do something that you guys can use for Valentine's day. And then it clicked, I thought why not merge the two themes together, so here is a Lady Bug Heart Nail Art - lady bug for the animal theme, and my favorite hearts for Valentine's day!

Valentine's Nail Art Tutorial - Lady Bug Hearts
I did this in a hurry so the base is a single coat of a holo polish that I reviewed HERE. You can opt for any light colored base (my suggestion would be go for a pale pink, lavender or even lemon)

So here are the steps that you can use to create this super easy simple nail art for Valentine's Day.

Sunday, December 8, 2013

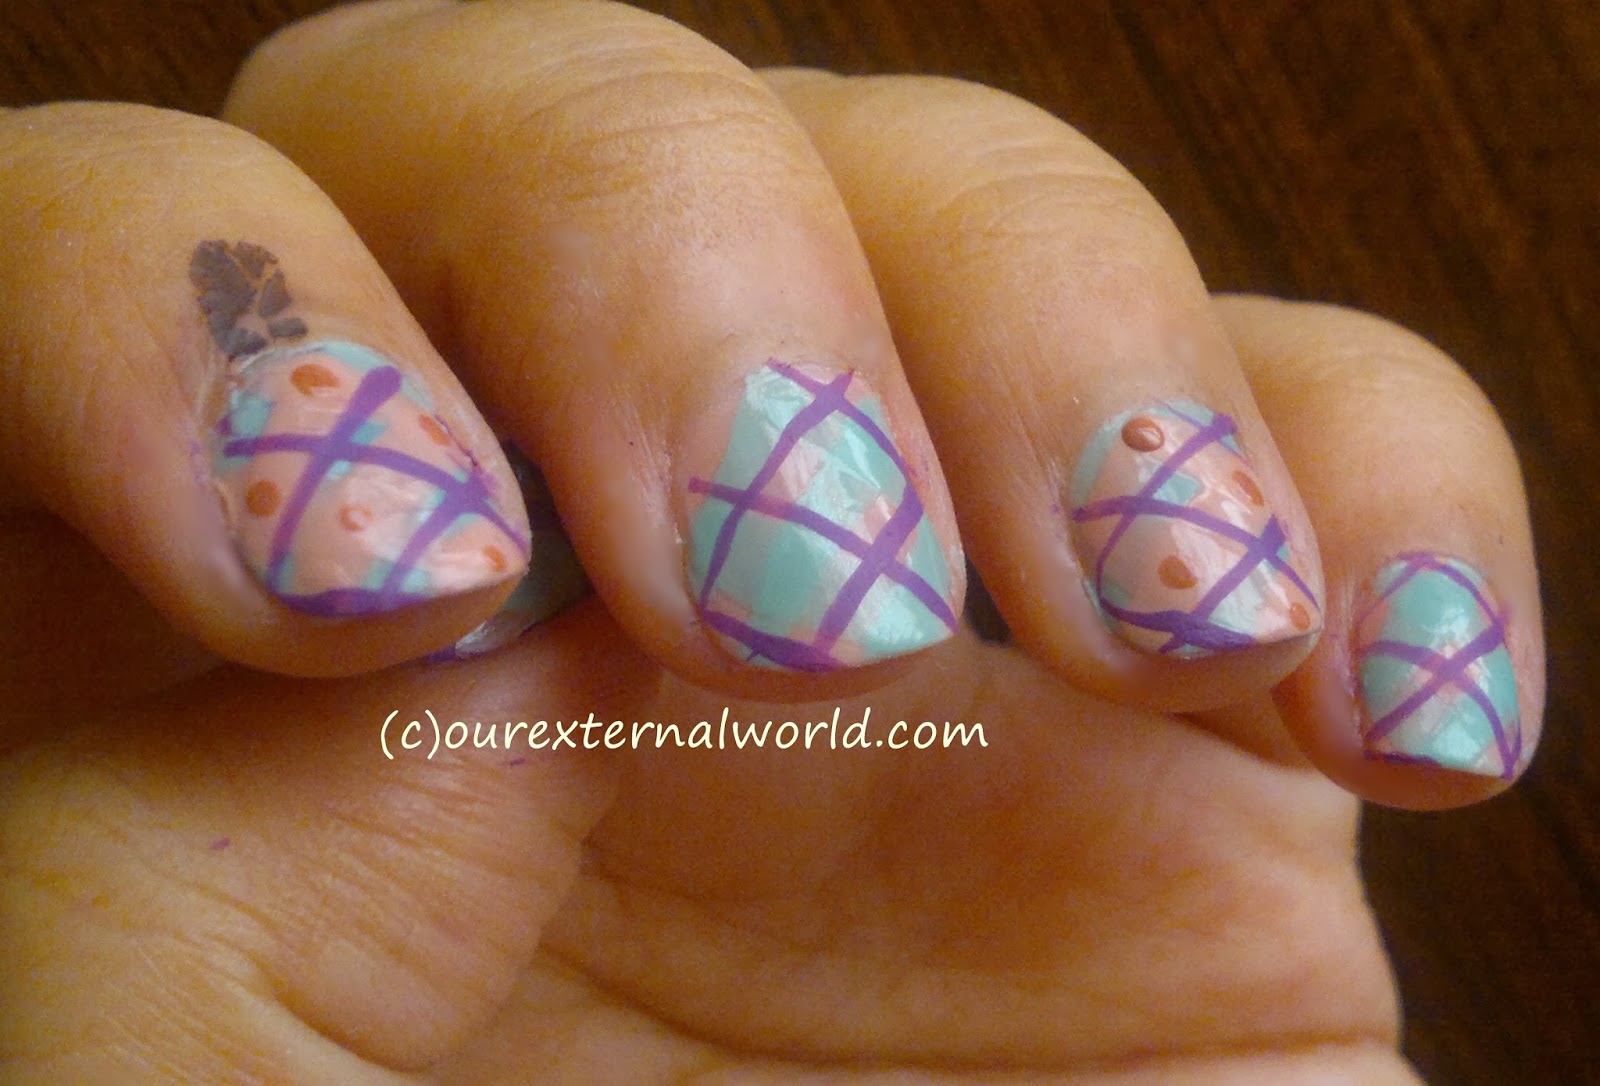
Winter Nail Art - Plaid Nail Art Tutorial

This is a plaid nail art I tried over the weekend and when you look at the step by step pictures you'll notice how easy it is to do once you break it down into steps.
Winter Nail Art - Plaid Nail Art Tutorial
I chose a mint and pink color as my base and topped it with a purple to add some depth.

Begin by painting your nails in a base color.

Wednesday, December 4, 2013

Christmas Nail Art - Candy Cane Nails With Tutorial

In a nail art challenge the theme was to use 3 polishes that are your favorites. I love white and red on my nails but my favorite polish is the silver from China Glaze. So keeping in mind the coming Christmas joy, I decided to do a nail art inspired by the candy cane.
Christmas Nail Art - Candy Cane Nails

So I've got the white and red for the candy cane, and I added a bit of silver to signify the celebration mood during Christmas!

Christmas Nail Art - Candy Cane Nails

After a very long time I have a picture tutorial for this nail art as well. I have broken down the steps for each of the patterns so that you can create this easily on your own nails.
Christmas Nail Art - Candy Cane Nails Tutorial
Christmas Nail Art - Candy Cane Nails - Tutorial

I hope this will be useful for you and will inspire you to create Christmas themed nail art for yourself and your friends.

Christmas Nail Art - Candy Cane Nails

I hope to do more Christmas nails during this month so do stay tuned. Have a great week ahead friends!

Friday, November 29, 2013

Spiral Nail Art Inspired By Robin Moses

Long back I had done a spiral free hand nail art inspired by one I saw by Robin Moses. And it was published on etailpr blog but I forgot all about it!

Today I am sharing the same nail art pics here.
Spiral Nail Art Tutorial


For a detailed step by step picture tutorial of this nail art head on over to etailpr blog and check out the detailed post Spiral Nail Art By Shilpa

linkwithin