Our External World - Indian Makeup Beauty Fashion Travel
Showing posts with label DIY. Show all posts

Saturday, September 9, 2017

Step By Step Frog Nail Art Tutorial

Today's post is a cute little nail art tutorial done by Vriddhi who is an amazing nail artist. Her choice of patterns and color combinations is always beautiful.

Let's get started and learn how to draw a frog on your nails!

Step By Step Frog Nail Art Tutorial


Things you will need:
Products Needed for frog nail art

1. Base Coat [used Luron base coat]
2. Nail polish - soft brown (or whatever background you choose for your frog) [used Luron nail polish, tips & toes 111]
3. Acrylic Paint (if you don't have acrylic paint, you can use nail polish mixed with a little acetone to thin it out)
4. Top Coat
5. Dotting tool (you can use the back of a toothpick if you don't have these)
6. Nail art brush (you can use a 0 number paint brush if you don't have a nail art brush)
Optional: Cuticle oil, quick dry top coat

Apply base coat to keep your nails looking healthy and to protect them from any chemicals in your nail polish. Base coat also helps your nail polish/nail art stay longer.


Step 1. We will create the silhouette of the frog's body

Sunday, July 24, 2016

DIY Magical Sea World with Colgate

Do you have a kid at home who loves to do some DIY? Well recently spotted were these Colgate toothpaste boxes which come with a Magical Sea World.
DIY Magical Sea World with Colgate, #colgatemagicalstories
DIY Magical Sea World with Colgate 


The box has a marking where you need to cut it open. Inside you will find different characters and shapes. Each shape has a dotted line where you need to cut these out. 

The concept is simple. Each shape when cut out also has small slits. Then there are base shapes which also have a slit. When you fix the base shape by sliding its slit into the slit of the main shape, it becomes a base for the main shape to stand on.

Monday, June 20, 2016

D.I.Y. Nail Polish Remover Jar

You might have seen this DIY in a lot of places. I had seen it long back but never took the time to make it. But when I finally did, I enjoyed it so much that I had to share it here.

We are going to make a DIY nail polish remover jar. A lot of these are available over the counter from Bourjois, ColorBar, and Sephora. But its fun to do it yourself!

Things you will need:
1. An empty jar - plastic with a wide mouth screw cap
2. Sponge (take one which doesn't dissolve with acetone or your polish remover)
3. Any nail polish remover

D.I.Y. Nail Polish Remover Jar
D.I.Y. Nail Polish Remover Jar - Things Required

To make sure your sponge will work, take a small piece and dip it in your polish remover. Then leave it for some time preferably in a closed container. Wet it a couple of times to make sure that you have tested it enough. The first time I made mine, the sponge actually started dissolving with the polish remover after a few hours and so I had to do it all over again!


D.I.Y. Nail Polish Remover Jar

The process is extremely easy. Take a sponge piece that is the same height as your jar. I used an old face scrub jar. The sponge was also a leftover from some packaging that I had opened. 

Now roll the sponge as shown in the picture below. You need the sponge to sit snuggly inside the jar and have a tight centre opening where you can place your finger. Tightly rolling a piece of sponge works well.

Wednesday, May 6, 2015

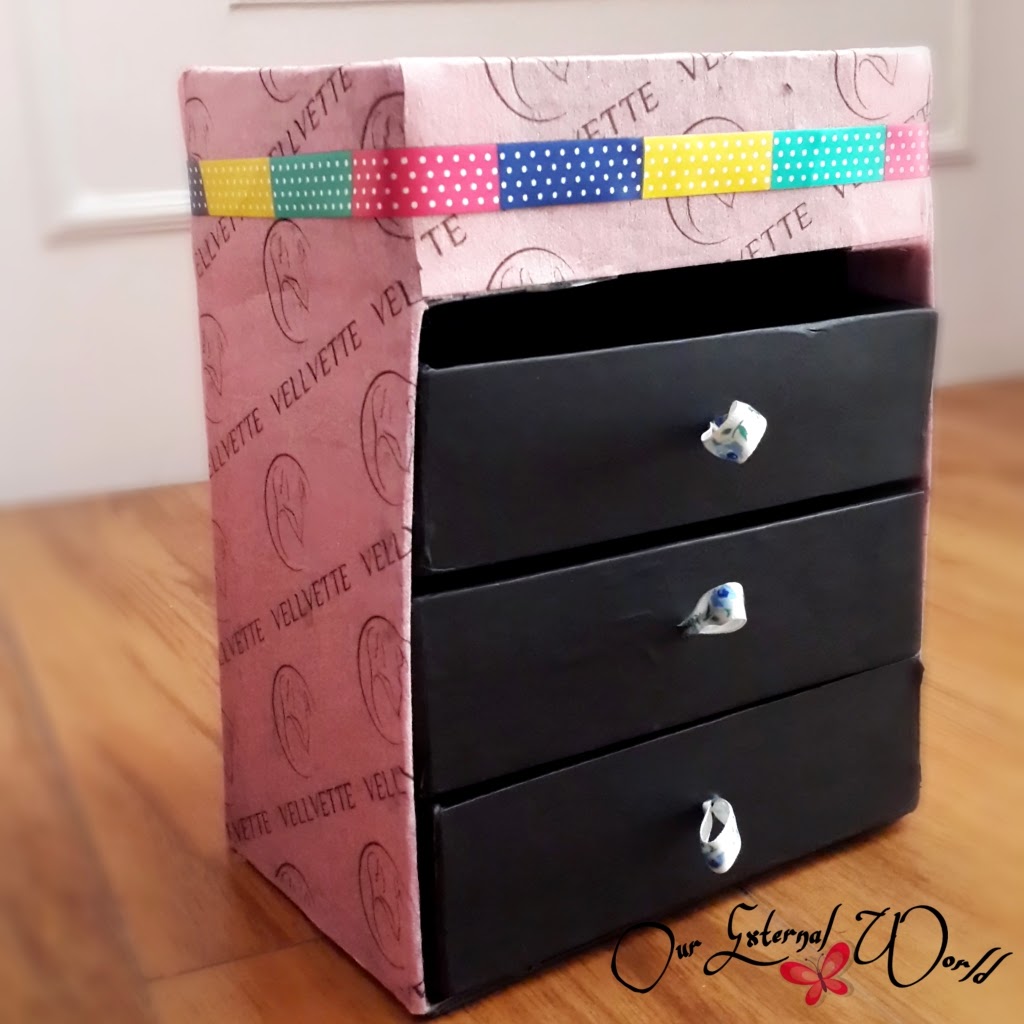
DIY Makeup Storage Box Tutorial Using Old Boxes

I don't remember the last time I posted a DIY craft here. Recently I was cleaning up one of my cupboards and found a whole stack of small black beauty boxes that I had been saving up. I was saving them up for creating a set of drawers to keep small knick knacks. Finally they saw the light of the day. 
DIY Makeup Storage Box Tutorial Using Old Boxes, jewellery storage
DIY Makeup Storage Box Tutorial Using Old Boxes


The tutorial is something I had seen almost two years ago on the Sweet & Bitter Blog (yes I've been saving these boxes since a very long time!) My steps are slightly different but the basic idea is the same. 

So lets quickly list down the things you will need:

1. 4 small boxes with lids
2. A pair of scissors
3. Glue (hot glue gun will do as well)
4. A whole puncher
5. Some wrapping paper and ribbons

Thursday, October 2, 2014

DIY Mehndi Design (Henna Pattern) Tutorial

Hi friends, its that time of the year again, Durga Puja, Diwali, Bhai Dooj, all festivals are lined up one after the other. And not to forget Karva Chauth.

I had shared a mehndi pattern tutorial on the blog which is the most loved on pinterest (you can see it here) I had thought I would do more such posts but I just realized its almost two years since I did that post, gosh! It is high time I share at least one more DIY mehndi tutorial with you all so that you can try it out one of these days during all the festivity.

I am planning on doing this on my hand on Karva Chauth, my  favorite celebration of love. (All my non-Indian friends you can search the festival names mentioned in this post on google as I don't want to go on ranting about all the goodness that each festival brings)

Coming straight to the tutorial - I saw this amazing henna pattern on instagram (shared by someone from facebook - I think its going around on a lot of social media channels but I have no idea who really owns this image.

I think this neat and simple patterns looks amazing. Just follow the picture tutorial below step by step and you will see it is an easy pattern and all that you need is a steady hand.

So first we begin with the most basic lines that make the pattern going through the center of the hand.

Friday, June 13, 2014

DIY Magnetic Calender

Hi friends, here is a DIY post on the blog after a long time. This one is by a dear friend who readily agreed to share her gorgeous creation with you all. Over to Anuradha!
DIY Magnetic Calender

DIY Magnetic Calender

Hi Girls,well, like me, if you are also bored of the routine paper calendars and wanna have a peppy calendar that suits your style, here is a super-cool DIY – Magnetic Calendar

All you need is an old picture frame, 1-2 magnetic sheet(s), A4 sheet in a color that you wish to use as your base, assorted designer papers, colored tape, adhesive letters & numbers, marker, ruler, pen knife, glue & a cutting mat.

For creating numbers, day/month names you can use variety of things – flat-base glass marbles, chipboard pieces, bottle caps etc. Basically anything that you can fit in your square boxes. I used compressed foam sheets which were available in different colors.

Steps-
  1. Let’s begin with resizing the magnetic sheet according to the picture frame using cutting mat, cutting knife & ruler. The magnetic sheet should completely fit inside the frame. My magnetic sheet completely fit the frame so I didn’t need any resizing.
  2. Create boxes on A4 sheet using marker & ruler to accommodate weekdays, month name & dates. I created a 7X6 matrix of 3cmx3cm each & left space on top for month name.
  3. Place the sheet on top of your magnetic sheet & fit it in frame. My frame looked like this –
DIY Magnetic Calender

Sunday, August 18, 2013

DIY - Face Pack For Tackling Large Pores And Acne

Here is a quick and easy face pack to make - it works for reducing large pores as well as combat acne. And the secret ingredient is Fenugreek - found in abundance in all Indian homes - known as Methi Seeds. Fenugreek is said to be  anti-inflammatory and hence helps heal the skin.
DIY - Face Pack Using Fenugreek For Tackling Large Pores And Acne
DIY - Face Pack Using Fenugreek For Tackling Large Pores And Acne (image source: 3morganic.com)

Fenugreek is available in seed and powder form. For this DIY you need the Fenugreek seeds.

Take the following items and follow the simple steps:

1. 1 teaspoon Fenugreek seeds
2. A small bowl
3. A teaspoon of chick-pea flour (besan)
4. A strainer

Thursday, August 1, 2013

How To Get Rid Of Yellow Nails (DIY)

Ever wondered how do all these nail art lovers maintain healthy white nails? Does your nail polish leave a yellow stain on your nails? Is the household work causing your nails to turn yellow?

Well you no longer need to worry! Here is a simple DIY you can use at home to regain the brightness of your nails.

How To Get Rid Of Yellow Nails - DIY

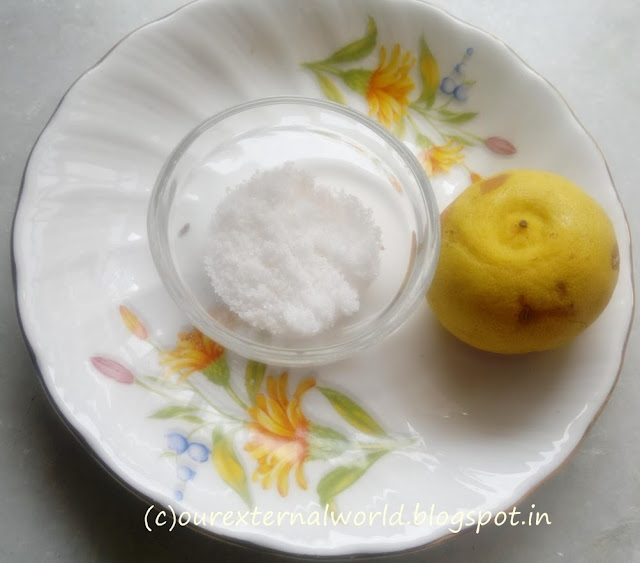
Things you will need:
1. Some salt
2. Some lemon juice
3. Olive oil (or a good hand cream)

Wednesday, April 24, 2013

IFabbo Favorites Of The Week – 20th APRIL 2013

The post on five easy DIY hairstyles has been chosen as one of the favorites for the week of April 20, 2013.


In case you missed that post you can read it HERE

Keep encouraging more such note worthy posts by leaving your lovely comments. Don't forget to follow on twitter, pinterest, facebook and bloglovin - links available on the right hand side bar.

Enter the international giveaway  HERE


Monday, February 25, 2013

DIY Tutorial Jewelry Storage Box

After a long hiatus from doing any DIY posts here I am with a simple to do project. And the end result is a gorgeous storage option for your jewelry and other trinkets!

DIY Jewelry Storage Box

DIY Tutorial On How To Create A Jewerly Box

This tutorial is going to be completely through pictures. So lets get started
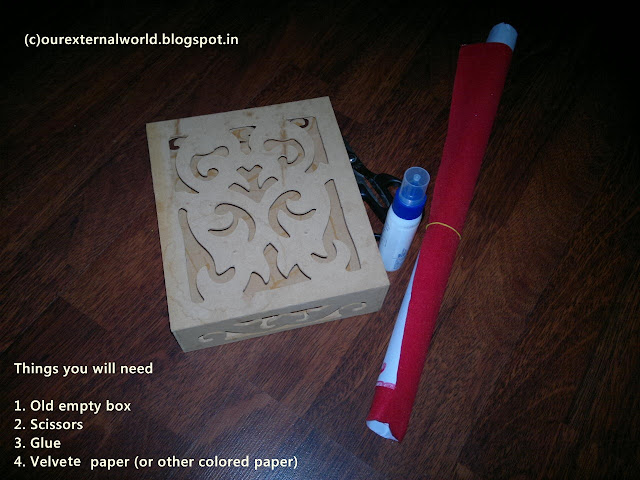
DIY Jewelry Storage: Things You Will Need
Things You Will Need For This Project

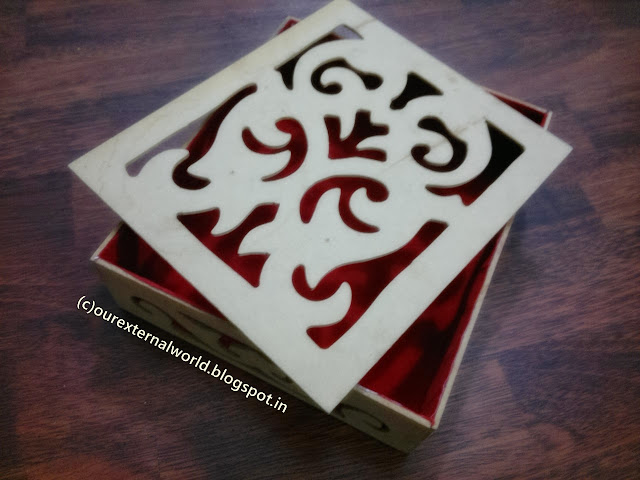
The box that I have used is a wooden board box which has a beautiful cut-out pattern on the lid as well as the sides. You can use any box that you might have lying around. Cardboard boxes work just fine.

DIY Jewelry Box: Step 1
Step 1. Clean the Empty Box

Saturday, February 9, 2013

Valentine's Day Contest Entry No 4 - DIY Bracelet

Demi from beautyandthemist.com has sent us a tutorial for making your own bracelet this Valentine.

Handmade Leather and Swarovski Bracelet
The Masterpiece - Handmade Bracelet


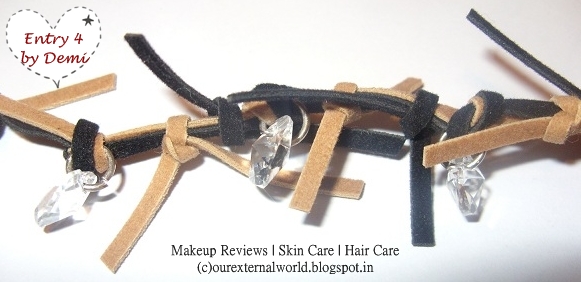
Demi says "It's made with brown and black suede leather, four heart-shaped swarovski crystals and all the metal parts are silver. I believe this is a gift a girl would like on Valentine's Day!"

So are there any men out there ready to try and make this specially for their better half?

Don't worry girls you can always make this for yourself and rejoice!

Handmade Bracelet Tutorial

Silver Rings - Handmade Bracelet
Leather Strips - Handmade Bracelet
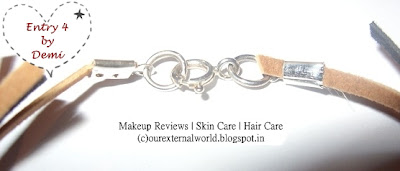
Clasp - Handmade Bracelet

Knotted Leather Straps With Swarovski Crystals Hung Using Metal Rings

Knotted Leather Straps With Swarovski Crystals Hung Using Metal Rings


The bracelet looks absolutely gorgeous. So girls are you going to make one for yourself?

The contest ends on 13th Feb, if you haven't sent in your entries please hurry. You can still take part in the contest - enter HERE

Wednesday, January 30, 2013

Valentine's Contest Entry 3

Valentine's Day Contest Entry 3

Fiona Hoosaney from West Indies sends in her entry for the Valentine's contest - a beautiful handmade pillow for her husband.


Valentine's Day Contest Entry 3

Valentine's Day Contest Entry 3

Thank you Fiona for sharing this - I am sure this inspires a lot of other girls to make something for their husband.

So girls what do you think of this beautiful entry by Fiona? And don't forget to take part in the contest yourself. Contest is open till 13th of February. For more details and rules please check HERE

Thursday, November 29, 2012

DIY: Transform Your Dress Into Ethnic Wear

Guest Post By Vandana

Today I am going to share one DIY.  Its about how we can change a dress into an ethnic wear!!!

This year when I thought of buying a gift for my friend, I had to face lots of confusion because so many questions were there in my mind, like what kind of gift I should give her on her birthday, what type of gift she would like etc.

And the main problem was that I wanted to give her a surprise, so I could not even ask her about her choice. Then I spent hours in searching a perfect gift for her. First I thought that I should give her footwear but then I thought that what if the shoes or ballerinas wont fit her? So I left this idea. Then I thought of buying chocolates and flowers for her but my sister said that I always gift her chocolates so I should gift her something different or special this time.

Then I went to a shopping mall and I saw one nice Maxi dress, I really liked it and it is so much in fashion too. So finally my search was over when I purchased that dress. This is the picture of the gift I selected.
Spaghetti Strap Dress
Now when I presented the dress to her, I was so excited and at the same time nervous too because I wanted her to like the gift. She did open the packing and what I see is that she likes the gift, but she was not so happy with it :(

Even I was so upset to see her like this, I asked her whether she liked this gift or not. She replied that she liked it but she cannot wear such dresses any more as nowadays she likes to wear the traditional or ethnic wear. I tried to console her that she will look awesome in this dress but I failed. Then again a new tension occupied my mind.

I thought a lot about what I should I because I wanted to make my friend feel good but I was unable to buy any new dress as I spent a lot of money in buying this dress :(

But after thinking a lot I took out the solution of this problem.I converted this maxi dress into an ethnic wear (well,I am quite creative and my skills worked well here ).

Now I am going to explain you how I changed an unwanted gift into the wanted gift.

~Firstly I took out that maxi dress.Then I cut off the dress at the hem to reduce its length slightly
Cut off the hem of the dress to reduce its length

~Secondly, to give it a traditional yet stylish look, I went to the market and purchased a pair of matching leggings.
White Leggings

-Thirdly she said she wont wear the sleeveless dress...OMG..I was like..not again..yaar.. but I had to think of a solution for this.

Tuesday, October 30, 2012

Do-it-yourself Henna/Mehndi Pattern For Karva Chauth

Before I begin, I wish to dedicate this post to my mom. This is for you mummy!!!!

Coming Friday, 2nd November is being celebrated as Karva Chauth in many parts of India. This is a festival where the wife keeps a fast the whole day in prayer for a long life of her husband. This day has been celebrated since ages specially in northern India. The fast is the hardest because you are not even allowed to drink water the whole day. Food and water can be had only after praying to the moon, so the wife has to wait until the moon is visible in the sky. She then prays to the moon and drinks water ending her fast.

The good thing about this fast is that ladies get to dress up (almost like brides) and put henna/mehndi on their hands. Since the festival is celebrated with quite aplomb these days getting a mehndi pattern on your hands is not easy. There are long queues that you have to wait in until your turn comes.

So this post is specially for all of you ladies out there, and specially my mom, who are planning to do it yourself this time.

I am going to show you how you can create a simple henna pattern on your hand yourself (or even get your husbands to make it for you if you are one of the few lucky ones!)

So lets first take a look at the finished design.
2012-10-28-1641
do-it-yourself henna pattern
As you can see the design is simple and yet fills the hand in a nice way.

Monday, October 1, 2012

How To Wax Your Upper Lips at Home

A lot of girls have upper lip hair and need to regularly go to the parlour to thread it away. Although there are many techniques available for hair removal, threading is the quickest. But it has to be done bi-monthly at least. And sometimes we just don’t have the time for a visit to the parlour and are left wondering if we could do something at home. Threading at home is also possible but takes a long time when compared to the time taken by a professional at the parlour.

So what then do I have to offer in this post? Well, its nothing other than an alternative to threading – that is waxing. Yes waxing the upper lip at your convenience in the comfort of your home. Waxing also has the advantage that hair grows out slower so you don’t have to repeat it every two weeks.

The product that I use for at home waxing is not your regular hot/cold wax that is available but rather something also known as ‘katori wax’. Sleek Wax Pack is a product that you can use for removing hair from your face at home very easily.
Sleek Wax Pack - Facial Hair Remover
Product
The wax comes packed in a metallic bowl that is inside a cardboard box. You can see the outer box in the photo above.

Thursday, September 27, 2012

The Unborn (A Painting)

After a long time I did a water painting. This time what I painted was quite different from my usual attempts.

The base of this painting is a doodle where I just closed my eyes and scribbled whatever shapes my hand drew. Once I felt I had scribbled enough I stopped and opened my eyes.

Then I concentrated on all the weird lines that lay in front of me.  And slowly an image started appearing out of these shapes. This is the image I drew over again leaving out lines that did not form a part of the image that I saw.

This was the final image I saw and painted. I call it 'The Unborn'. I saw a mother holding a new born child but I still called it 'The Unborn' because of the way the image turned out. It seems like the child is still inside the mother wrapped up away from all worldly harm.

I chose green to represent the mother because a mother is the provider all her life for the child. The child is in red - representing the childlike energy. And behind the mother is a yellow hallow - it represents the shielding nature of the mother.
The Unborn - water colors
The Unborn

I hope you all like it!

You can view my other water color attempts as well
Soul
Faceless Expressions
Water Colors Again (three different paintings)
Bringing Back Old Memories

Monday, September 24, 2012

How to Cover A Gray Strand of Hair Right Before A Party!

With growing changes in our lifestyle and the daily physical and emotional stress we all go through, you will notice that everyone seems to be spotting a gray strand much earlier than their age to be called old. I too started facing grays quite soon in my life. I started changing my hairstyle so that they won’t show through but over the years they have spread – one here another there – as if challenging me to make any hairstyle but they would still show through.

I am too scared to actually color my hair. I don’t know what kind of allergic reaction I might get (even with the best of the best brands). That is when I knew there had to be at least a temporary solution to my problem – something I could do to hide them when going out.

How To Hide Gray Strands Right Before A Party
How To Cover Gray Strands of Hair

I was cleaning my vanity area when I saw an almost used up

Wednesday, July 18, 2012

Sun and Moon in my cube– DIY old basket remodeling

Cane or bamboo baskets come in all shapes and sizes. These baskets are more or less the same in their raw form, wood colored, sometimes very dull and usually thrown around in some cupboard or storage area in the house.You might have one lying around your house somewhere. I did. 


The basket I had was without handles and looked somewhat like the picture below except that mine was more curved on the sides.


This basket became my canvas and soon I transformed it into
Sun-Moon basket plaster of Paris DIY
Yes my basket now adorns my cube (at work) with a bright moon and sun motif. I use it to hide the plugs and sockets on one corner of my cube.

And now the how to of this little DIY of mine.

Tuesday, July 3, 2012

My very own kitchen clock–simple DIY!

I love sleeping but due to a bad back my sleep is always disturbed. That is why I don’t sleep well and hence I am always running late for work. We used to have a clock in the dining area but I had to step out of the kitchen to see the time while cooking. So one fine day I decided to get a clock put up in the kitchen. We looked around and found a boring clock lying around the house.

It was a big round clock with a plain white face. The only saving grace was a bright red circumference which caught my eye. Now I really did not want to look at this boring thing every morning so I wanted to convert it into something brighter. And since my plan was to put it up in the kitchen I knew my them for the next DIY was staring at me in the face!

This is what the clock looked like (except the hands were all plain black) before it came in my hands!


After some effort this is what became of my boring clock – transformed into a pretty kitchen wall clock!
kitchen-clock


Thursday, June 28, 2012

Plaster of Paris On My Cup!

Plain white cups of different shapes and sizes are lining the shelves of several shops. I had one such cup lying with me and the urge to transform it was high. The shape of the cup is lovely and the color plain white. But I did not let it last that way for too long.

A little bit of plaster of Paris, some acrylic paints and the rest left to my imagination. Since my aim was to bring color into the life of my little cup this is what I did to it.

plaster-of-paris-cup1plaster-of-paris-cup2
plaster-of-paris-cup3

Plaster of Paris dries up really fast but is very easy to use. Clay needs to be baked so I find plaster of Paris to be a friend in need when I feel this creative! I don’t have a step by step picture tutorial for this piece but I will explain the steps I followed to create this piece.

linkwithin