Yes water marbling - can you believe it - a nail art technique using water! When I was browsing through the China Glaze website I saw this tutorial and it looked so awesome I just had to give it a try.
Here is a picture taken from the web showing a neat and clean version of the water marbling nail art.
 |
| Picture courtesy: www.makeuptalk.com
|
So even though my first attempt results are not that awesome I will surely share the step by step tutorial on how to do this sort of nail art.
 |
| Water Marbling - finished result |
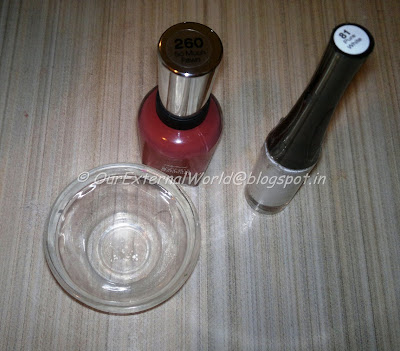
What all you will need -
1. A small bowl of water (water should be at room temperature - this is very important)
2. Your favourite nail paints (at least two different colours)
3. A toothpick or some thin stick (preferably wooden)
4. Nail polish remover
5. Ear buds
 |
| Water Marbling |
So here we go. Start off by putting some water in a bowl. Make sure the water is at room temperature.
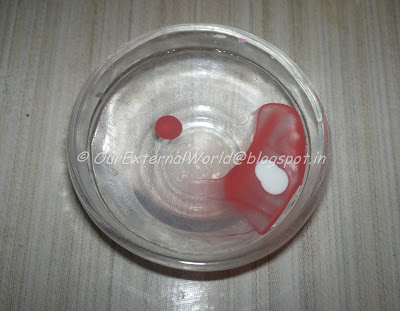
Now take a nail paint, dip the brush in the nail paint and don't wipe off any extra. Put a drop of the nail paint in the centre of the bowl of water. It will slowly start to smear on top of the water.
 |
| Water Marbling - STEP 1 |
Repeat this with the next colour putting the drop in the middle of the existing drop of colour. Keep repeating this till you have concentric circles of different colours. You can create any combination of colours depending upon your imagination. I played it safe with only coral and white nail paint. And as you will notice my design ended up towards one edge of the bowl and was in no way circular!
Nail paint tends to dry fast on the surface of water so think of your design before hand and do the above step very very quickly.
 |
| Water Marbling - STEP 2 |
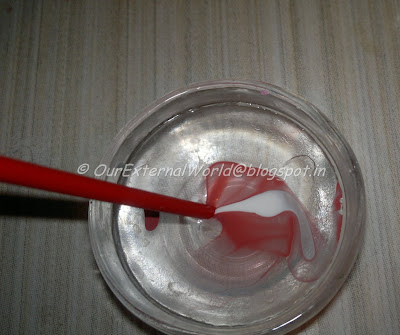
Nail paint will settle in the form of a light skin on top of the water. Now take the tip of the tooth pick and gently pull the colour in any direction. From the centre towards the edge of the bowl gives a nice pattern.
 |
| Water Marbling - STEP 3 |
Don't pull too hard or you'll end up with all the nail paint on the toothpick itself. Once you have created some pattern using the toothpick, gently dip your finger (nail side down) onto the surface of water with the nail paint. The skin of the nail paint on the water will stick to your nail and also to your finger. Use the toothpick to steer unwanted nail paint away from your finger. Look in the image how the stretchy surface is seen on the water - that is the nail paint skin trying to stick to my finger nail.
 |
| Water Marbling - STEP 4 |
One nail is done. To repeat on the other nails clear the water and start over. Once you are done with all the nails you will have something looking like the picture below - notice all the extra nail paint on my fingers!
 |
| Water Marbling - almost done! |
Once the nail paint is dry (its almost dry when you take out your finger) take an ear bud dipped in nail polish remover and clean out the mess around your nails. Finally you should have something looking like this:
 |
| Water Marbling - done! |
I am surely going to try this again making a more predictable pattern in water. I did not create concentric circles hence my design is totally asymmetrical.
Hope you enjoyed reading this and will give it a try. It was real fun for me and the finish comes out nice and smooth. With practise better clean designs are very much possible!
style tip: stick cello-tape around your nails and on the fingers before dipping in the water. This way you will prevent the extra nail paint from sticking to your fingers


this is pretty shilpa....but personally i avoid doing water marbling in front of my studio clients....because it becomes messy and gives wrong impression to the clients and i never want to risk it...but for hobby its very fun activity...next tym when u do it use dark colors and hint of black too the result will be more sharp...:)
ReplyDeleteI can totally understand the bit about doing it on clients!
DeleteThanks for the great tip - next time I'll use darker colours for sure!
shilpa it's so much fun I m surely going to try it
ReplyDeletei loved the fun procedure
Vish, read some of the comments here for more tips on doing a better job :)
DeleteHi Shilpa. I tried water marbling long before I began a blog, so I do not have pictures to post. You need to do two things: Paint your nails with one of the colours you are using for swirling. This will not only give your art a base, it will also be a failsafe if you do not manage to cover the entire nail. Also, I applied vaseline on my fingers and around my cuticles carefully before doing this. The clean up was unbelievable easy. You can also tape off your fingers. Lesser area to clean :)BEst of luck with your next attempt!
ReplyDeletethanks for the great tips - will surely follow in my next attempt!
DeleteHi..nice attempt Shilpa. Will try it someday for fun
ReplyDeletethanks Ray!
Deletenice attempt shilpa... nd yes i agree with Puja tht it looks quit messy in front of clients... do try dry water marbling .. its safe nd more neat to do.. i hv posted abt it
ReplyDeletethanks Dimpal - sorry for such a late reply - don't know why I haven't replied back on this post :)
Deletei love water marble technique...its fun !!
ReplyDeleteyup :)
DeleteNIce post Shilpa.. I agree with Indian Laquerade, do use a base color before you marble your nails.. Dark color enhance lighter shades XOXO
ReplyDeletehttp://addictedtonailpaints.blogspot.in/
thanks dear, I will try this again after following all your tips!
Deletethat was a nice one shilpa... i love water marble nails but i hate the messiness it creates, its pain to cleanup *.*
ReplyDeleteanyways i have this linkup party at my blog every wednesday and theme would be always pink... so do stop by and submit your post link... looking forward to see you there...
new here, following you, follow me back if you like....
www.lipglossaffairs.blogspot.in
have been following you dear. And thanks!
Deletehi prachi here i like water marbling too.................I wanted to ask are there any specific brand nail polish to be used for marbaling.....in my case some of my polishes are not at all spreading.
ReplyDeleteAppreciate your reply. Thank you.
Hi Prachi, try maybelline colorama polishes (the new colorshow polishes are quite thick)
Deleteyou can also try the elle 18 nail pops, they are cheaper too.
thanks for the reply
ReplyDeleteYou're welcome dear
Delete