Our External World - Indian Makeup Beauty Fashion Travel
Showing posts with label stamping. Show all posts

Monday, December 25, 2017

Merry Christmas !

Hello everyone! Hope you all are enjoying yourself during the last week of the year!

If you have holidays during this time go out and make the most of them. For those of you who are still working, hopefully the workload is lighter than normal.

Merry Christmas

I created this simple Christmas nail art which I call The Pink Christmas!
I used Cici & Sisi Christmas stamping plate, Innisfree Eco Nail Color Pro 2 nail polish, and KB Shimmer Green Hex Glam glitter polish to create the tree.
Do take good care of your health and relax whenever you find the time to.

Let me know if you have some Christmas plans in the comments below!

Merry Christmas!!!!

Follow Me On Instagram | | Pin It

Tuesday, August 15, 2017

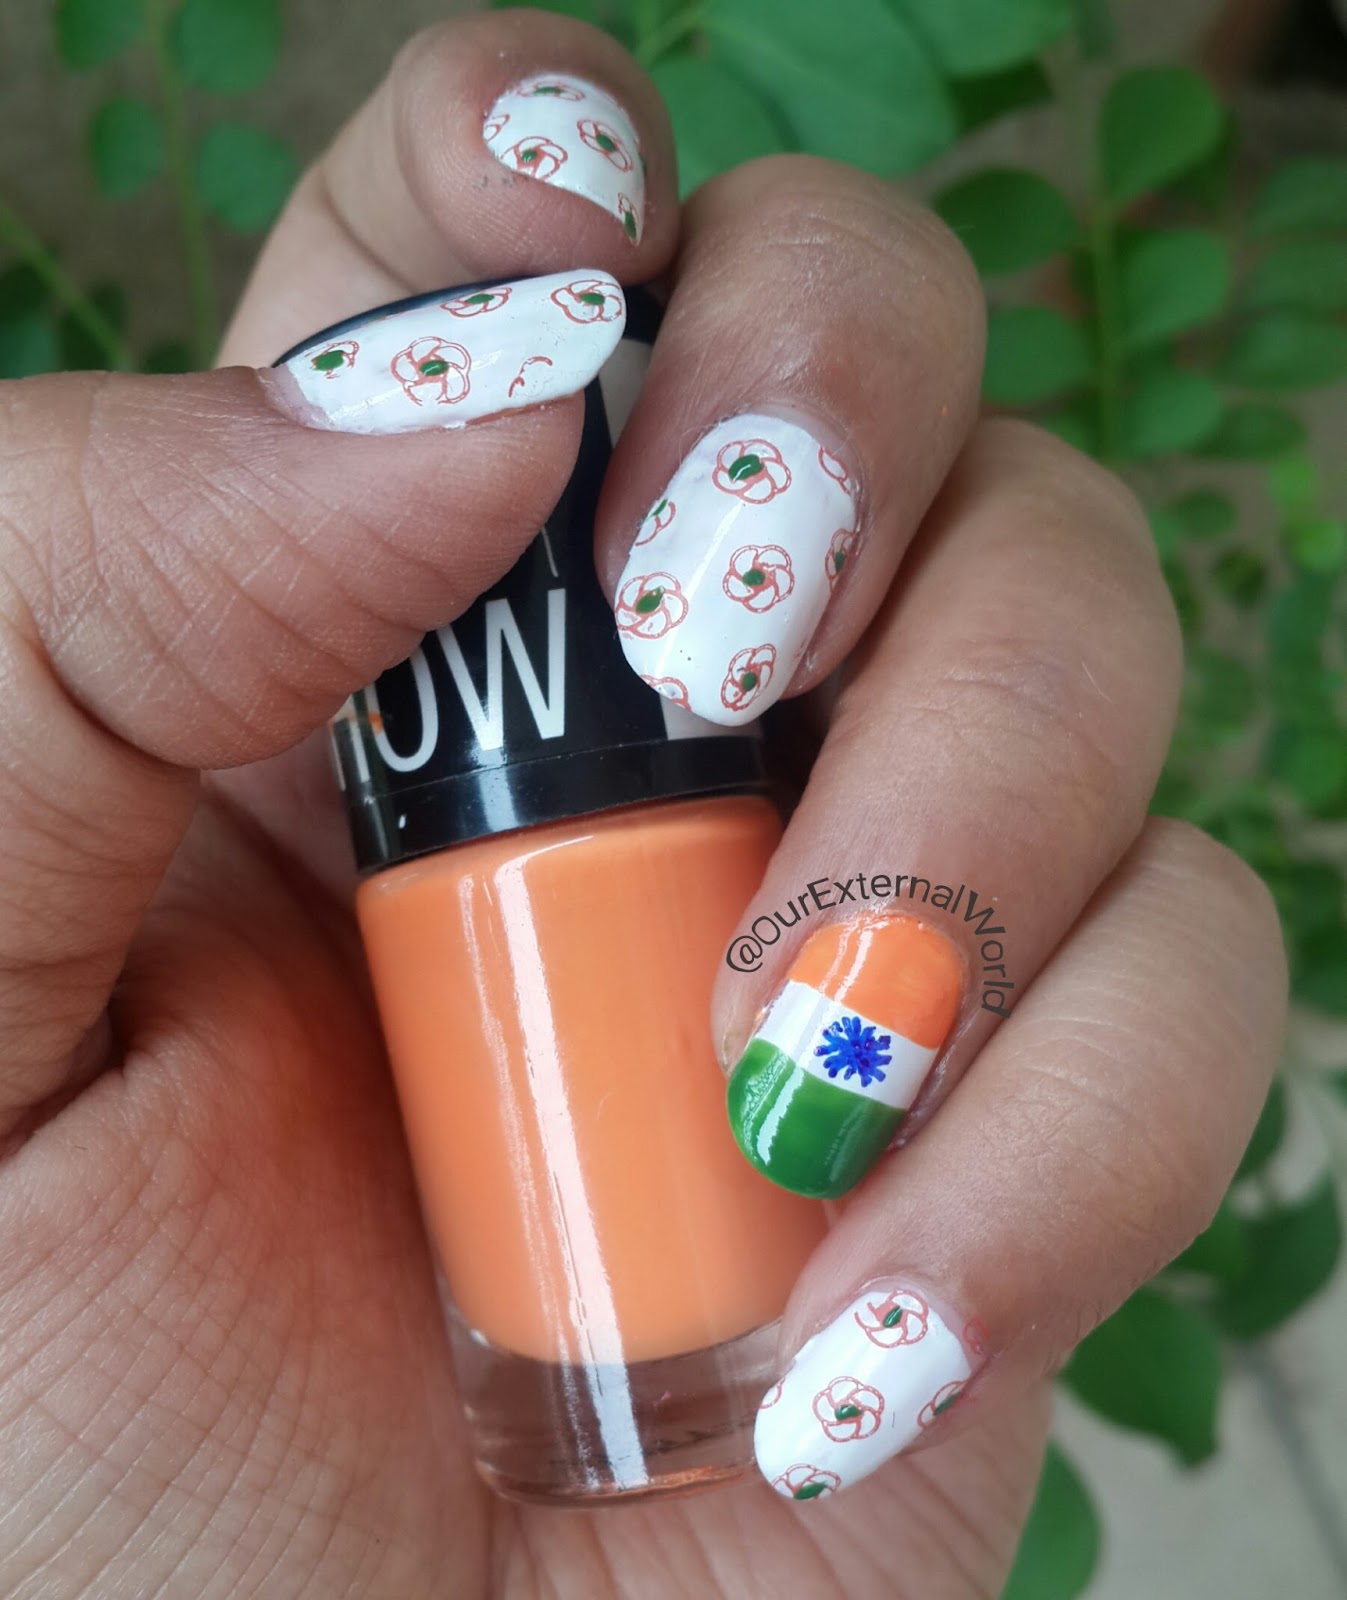
Happy Independence Day India!

Wishing all the readers of Our External World a very Happy Independence Day!

Indian Independence Day Nail Art, TriColor, National Flag
Happy Independence Day India!

I did this basic nail art in the colors of our flag. Polishes used are all from Maybellne Color Show range.

Hope our country finds independence from greed, poverty and hatred!

Follow Me On Instagram | | Pin It

Monday, February 13, 2017

Water Decal Butterfly And BPS Clear Jelly Stamper Nail Art

When I first saw a clear jelly stamper I knew this would be another milestone in the way I stamped. When I first got my hands on it, I was thrilled, and the reasons are quite obvious.

Water Decal Butterfly And BPS Clear Jelly Stamper Nail Art

A clear jelly stamper allows you to clearly see where you are placing the stamp pattern on your nail. And what this essentially means is that you have full control when you are doing double stamping, infact now you can go ahead and stamp multiple designs one over the other placing them carefully to create the pattern you so desire.

The clear jelly stamper I have is from born pretty store and comes with two scrapers.

BPS Clear Jelly Stamper

Friday, January 1, 2016

UberChic Beauty XL Stampers - Review

UberChic Beauty stamping plates changed the way I looked at stamping as a nail art technique. And when I came across the XL Stampers from the same brand it amped up my stamping skill to a whole new level!


UberChic Beauty XL Stampers - Review, Nail Art Blog
UberChic Beauty XL Stampers - Review

The XL Stampers from UberChic Beauty are non-sticky stampers. One set came with a single metallic holder and two stamper heads. They come packed in a cute little metallic box along with a flexible plastic scraper that works great to scrape off excess polish from the stamping plates. The stamper head pack contains one dark grey stamper head, useful when stamping with lighter color polishes. And, the other is white so that you can clearly see the designs when stamping with darker nail polishes.

The stamper heads do not need any priming and can be used straight out of the box.

The UberChic Beauty XL stampers are so squishy that I enjoy the whole process of stamping. The stamped designs come off clean from the stamper without leaving any residue. But this is not it, the best part is that cleaning these stamper heads in-between stamping of different nails is so darn easy! All you have to do is roll over the stamper on a piece of paper and any left over pattern of the stamped design comes off clean. I am so thrilled that I no longer need to worry about cleaning the stamper head in between different nails. It save me so much time!

Price: USD 11

Friday, October 23, 2015

UberChic Beauty Far East Stamping Plate - Reviewed, Stamped

Hello friends, here is a review of a nail stamping plate I have used in almost all my recent stamping posts that I have shared on instagram. Finally here are the details about the Uber Chic Beauty Stamping Plate Far East.

As the name suggests this plate has designs that represent the eastern countries of China and Japan. From dragons to fans this plate covers a lot of images. There are 14 XL designs, 14 smaller designs and one big rectangular area. There is also one big dragon that is about 2 XL areas put together.

UberChic Beauty Far East Stamping Plate - Reviewed, Stamped, Indian Nail Art Blog, Beauty Blog
UberChic Beauty Far East Stamping Plate - Reviewed, Stamped

Here's a look at all the designs stamped with a local black polish. Some images did not stamp completely because I had the air conditioning on while stamping. The temperature was soaring when I stamped these and I just couldn't bare the heat.

UberChic Beauty, Far East Stamping Plate, Panda, Dragons, Indian Nail Art Blog, Beauty Blog
UberChic Beauty Far East Stamping Plate - Reviewed, Stamped

I stamped using the same polish over Elephantine Pink from OPI. This is one design. The designs are quite big for my nails so I was able to break a single image into two different patterns.

Sunday, September 13, 2015

Parrot Polish Ocean Currents (thermal) - Review, Swatches, Nail Art

Parrot Polish drew my attention towards it because of the bright parrot logo. The two lovely people behind the brand Sonja and David, love birds, I've seen their real life parrots and their love reflects in their polishes.

I have two polishes from this brand and today I'm sharing one of these - Ocean Currents.

Ocean Currents is a pretty blue coloured polish which is thermal - yes it changes to a green color in cold water (or was it hot water - jeez I can't remember! It must be green in cold because the temperature here is hot and the polish is blue - so!). The polish is 5-free (formaldehyde, toluene, and dibutyl phthalate free).

Parrot Polish Ocean Currents (thermal) - Review, Swatches, Nail Art, indian nail art blog, indian beauty blog
Parrot Polish Ocean Currents (thermal) - Review, Swatches, Nail Art
Parrot Polish Ocean Currents (thermal) - Review, Swatches, Nail Art, indian nail art blog, indian beauty blog
Parrot Polish Ocean Currents (thermal) - Review, Swatches, Nail Art

The polish is a bit runny and gives an almost jelly like finish due to its texture. I used a sponge to create a gradient effect on my nails and then stamped over it using a silver polish. I think this blue looks perfect with my skin tone. In person I love how blue polish looks on my nails. 

Price: US$ 12

And I hope in the image below you can see the green - the tips of my nails and the accent finger nail. Its always tricky to capture the thermal effect of polish. I know it doesn't last long but I love thermal polishes because of the fun element - now its blue and in winters it will be green - and any time you wash your hands or work with a different temperature - you see it changing right before your eyes! Childish you say - well let's always keep the child in us alive - that is what life is all about isn't it?

Friday, August 28, 2015

HPB Presents Neon Star Attack

Before I show you what I did for this months HPB link up, let me confess that I do not use neon on my nails at all. Only to show you swatches if ever. The reason is it makes my hands look extremely dark (and you'll see that in the pics)

But, this months theme was Neon. And so I picked out the most neon looking polish I have - Madam Glam Mint Cocktail.

I did a simple mani for this months theme, simply did some stamping using Uber Chic Stamping Plate 02 from Collection 2. The polish I used for stamping is from Oriflame called Purple In Paris
HPB Presents Neon Star Attack, neon nail art, stamping, uber chic, madam glam
HPB Presents Neon Star Attack

Monday, March 16, 2015

UberChic Beauty Stamping Plates Collection 02 Review

Hello everybody! Have you seen my recent nail art posts on instagram? If you have, you would've noticed that I am doing stamping using the new UberChic beauty stamping plates. So here is my review on these plates.

I have collection 02. This collection has 3 plates. Each plate comes with the standard blue protective covering. The plates are smooth at the edges.

UberChic Beauty Stamping Plates Collection 02 Review


UC2-01 is based on the theme of coffee, party and some optical illusion patterns.
UC2-02 has mixed designs from floral, optical illusion, and love.
UC2-03 is all about travel.

Each plate has 24 large patterns and many tiny text and images. All the designs have been created so that even if you have small nails like mine, you can still get the image to show up on your nails. The designs are 17 x 21mm. Each plate is 9.5cm by 14.5cm.

I stamped some of the patterns from each plate very quickly using a Maybelline ColorShow Black Out (this is not a stamping polish but is a very affordable polish a Rs 85 that stamps well)

UberChic Beauty Stamping Plates Collection 02 Review

All the images stamp very well.  I love how the images are very finely etched. When I was trying these plates out I just felt like stamping had all of a sudden become very simple - except for the world map image, all others were so easy to stamp.

Tuesday, March 3, 2015

What is Reverse Stamping Nail Art

I haven't been able to complete all my nail art challenges for February. But I really wanted to try out this technique called reverse stamping.

Reverse stamping is essentially a technique where you pick the design from the stamping plate (like normal stamping) but instead of stamping it onto your nail, you first fill it with some color and then create a sticker sort of thing from this pattern.

What is Reverse Stamping Nail Art, el corazon, fashionista #02, maybelline black out, tutorial, how to
What is Reverse Stamping Nail Art

There are two methods of creating the sticker.

Reverse Stamping Method 1
1. Stamp an image on your stamper
2. Color in areas that you wish (use polish though acrylic colors will work too)
3. Use a clear polish or top coat to cover the entire design on the stamper.
4. Let it dry - let it dry for a few hours so that you can peel it off from the stamper and place it on your nail just like a sticker.
5. Put clear polish on your nail, place the sticker from step 4, and trim it off as required.
What is Reverse Stamping Nail Art, how to, tutorial
What is Reverse Stamping Nail Art

Reverse Stamping Method 2
Another technique of reverse stamping is where you create the sticker on a plastic sheet.

Friday, December 12, 2014

Winter Nail Art Tutorial - How To Make A Snowman

Hi friends, finally the Delhi winters have started playing peek-a-boo. The day is still quite hot but the mornings and evenings have started feeling cold. I have taken out my woolens and actual dread the extreme weather. I am a spring person completely (unless its complete snow-capped mountain kind of winters!)

But for all of those out there who not only enjoy winters but wait for it eagerly here is a nail art I did last weekend.

Mr. Snowman has come visiting on my nails!

Winter Nail Art Tutorial - How To Make A Snowman, STNChallenges, sponging, snowflakes, stamping
Winter Nail Art Tutorial - How To Make A Snowman 

As part of a winter challenge for nail art in the STNChallenge group the theme for this week was snowman and so I did this nail art. A few of my friends at work actually noticed and appreciated my work, so yay! It always feel awesome to get appreciation in person. I hope you all will like it too. Do leave your comments to let  me know.


And I also did a quick tutorial for how to make a snowman, step-by-step pictorial to help you create a simple cute looking snowman on your nails.

Winter Nail Art Tutorial - How To Make A Snowman, free hand, dotting, stamping, step by step
Winter Nail Art Tutorial - How To Make A Snowman 

I used two gorgeous polishes for the base, one is from a brand called Envy and the other is from Health & Glow. Both these are only available in Mumbai and my sister got these for me on a trip to the city. These are awesome polishes and cost only Rs 50! How I wish we had such good value-for-money brands in Delhi.

Friday, November 14, 2014

Nail Art - Happy Children's Day

14th November is celebrated as Children's Day in India. It is also the birth anniversary of Pt. Jawaharlal Nehru. Pt. Jawaharlal Nehru loved children and children loved him.

I did not have time to do anything elaborate so I decided to do a quick stamping nail art and some free hand.

Nail Art - Happy Children's Day

I have used Ella+Mila polish in color Sunkissed as the base (more on this polish soon!)

Pt. Jawaharlal Nehru is also famous for his signature cap called the Nehru Topi (which I tried to scribble on my little finger's nail) and he loved roses too.

Nail Art - Happy Children's Day

I hope all the children across the globe have a fantastic time accomplishing their dreams.

Happy Children's Day!

Follow Me On instagram | facebook | pinterest

Sunday, October 12, 2014

Dell Venue 7 and My Karva Chauth Henna & Nail Art

Yesterday was Karva Chauth, a festival celebrated by Indian women to pray for the longevity of their husband. They wake up early morning, pray to God and start a 'Nirjal' fast for the whole day - no food and most importantly no water for the whole day. They open their fast after looking at the moon through a sieve. The whole day is spent adorning hands and feet with henna, dressing up and keeping one self busy so that the thirsty dry throat becomes a non-issue.

I was supposed to do a Karva Chauth special nail art yesterday. But I was superly busy applying henna to my hands and was pretty low on energy and hence skipped doing something too intricate for my nails.

But what I did do was use my Dell Venue 7 tablet to click pictures. I know I have raved and ranted about the fact that I don't like the camera on the tablet. But since I was up early it meant I had all the sunlight I wanted to use the camera of the tablet. So I used it for clicking my henna and my final nails. I also edited the pictures on the tablet.

First let me show you my henna (if you follow me on instagram and facebook you must have already seen these)

Dell Venue 7 and My Karva Chauth Henna & Nail Art

The back of the hand has same pattern for which I shared a step by step tutorial (HERE) a couple of days back.

Wednesday, August 13, 2014

Independence Day Nail Art - Let The Tri-Color Inspire You

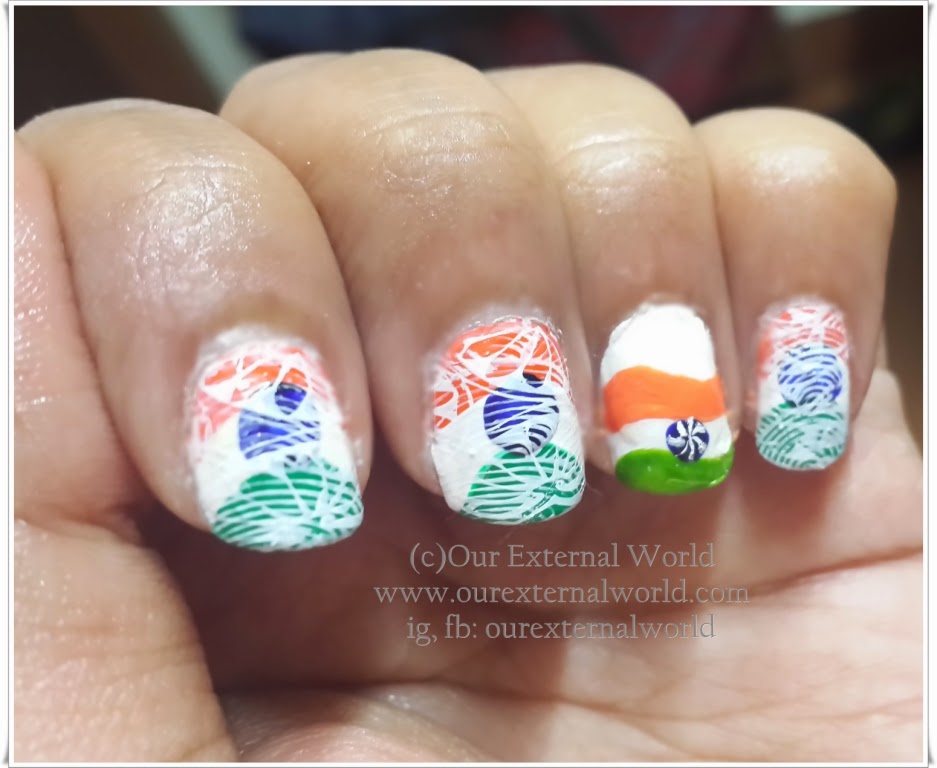
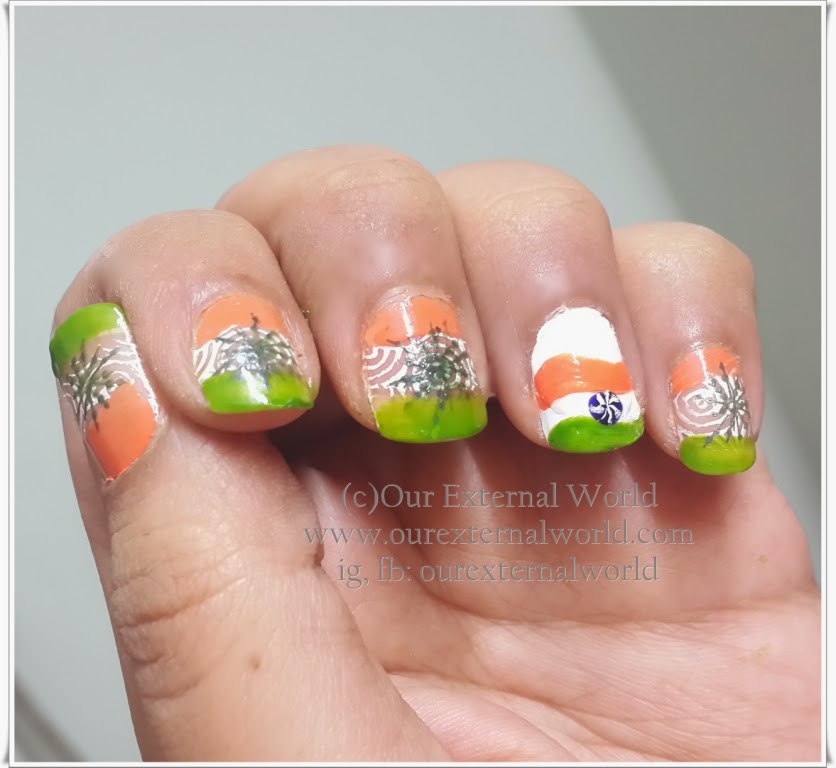
15th August is the Indian Independence Day. To celebrate this day in our own little way me and my nail art buddies decided to do nail art using the tri-color theme.

I had these wonderful ideas in my head but am not too impressed with the final results. I am still going ahead to share it with you - no shame in sharing - I think these would have come out much better had I been a bit patient.

Independence Day Nail Art - Let The Tri-Color Inspire You

Anyhow, I do hope you like the idea behind these nails. I actually did two different versions. Both these are multiple stamping over free hand. I have one more idea in my head using a very different technique. I hope I am able to do that before 15th August, 2014.

Independence Day Nail Art - Let The Tri-Color Inspire You

Happy Independence Day everyone. Let this day bring you independence in your thoughts, don't be a slave of superstitions or ideas that have been fed into your head without any logic or sense. Live to breathe freely, think freely and love freely!


Follow Me On instagram | facebook | pinterest

Saturday, August 9, 2014

Raksha Bandhan Nail Art - 3D Rakhi Nails Tutorial

Hi friends, this is another nail art post specially for Raksha Bandhan. Rakshan Bandhan is a Hindu festival that celebrates the love between brothers and sisters. On this day sisters tie a thread of love and good luck on their brother's wrist. This thread is called the Rakhi. The brother in turn vows to protect his sister. There is a lot of historical significance to this festival (you can read it on wiki-pedia)

The ordinary thread over time has changed many forms - from crystals, to the now popular diamond studded Rakhis - the humble holi thread has had a makeover.

To capture the festivity of this day I tried to recreate a tiny little Rakhi for my nails. I know this might sound a bit crazy but then who wants to be normal! The pictures were all taken when all of my nails were still wet - you can see the wet polish around the accent nail with Rakhi.

Raksha Bandhan Nail Art - 3D Rakhi Nails Tutorial
Things you need:
1. Tiny embelishments for creating the Rakhi - I used green nail studs and one flower crystal stud.
2. A thin thread - I used a golden thread from a ribbon I had - you can use a normal thread and coat it with golden polish
3. Clear top coat
4. Zip lock bag (or any similar plastic bag)

Tuesday, August 5, 2014

White Dress Inspired Nail Art

Just wanted to quickly share a nail art I did recently from a white colored pretty dress called Ivory Day Dress (from a website modcloth)

The dress is very elegant so I decided to go with a pearly base for my nails.
I used Lakme 9 to 5 nail polish White Book (reviewed and swatched HERE) as the pearly base.

White Dress Inspired Nail Art

On top I used a local brown metallic polish to stamp delicate lace patterns on the nails.

I hope you like this - for more such updates do follow me on instagram. And let me know if such small nail art update posts are helpful and inspire you to try something of your own.

Modcloth has a blog where they share more such ideas you can check HERE

Follow Me On instagram | facebook | pinterest

*PS: This is not a sponsored post

Tuesday, June 3, 2014

Letters To Juliet - Movie Inspired Nail Art - Water Marble Nails

Hi friends, how is everyone out there? I am doing good but tired of the hot humid weather (and this is just the start of summers!) Today I'm sharing with you a nail art I did for the STNChallenges Inspirational June, head over to my facebook page to find out more about the challenge. The first theme for the month of June is movie/book inspired nails. Also I am part of ILLChallenge and the theme this week was water marble nails - so as always I clubbed them both together!

My first and only movie inspired nails were based on The Devil Wears Prada (head over HERE to see what I had done). But I have always wanted to do something based on the movie Letters To Juliet. I found the movie so refreshing, the locations were picturesque and it had songs just like our bollywood movies. Its a very girly movie so if you like them do watch it. (Oh and I loved the hair styles that Amanda Seyfried had throughout the movie).

Letters To Juliet - Movie Inspired Nail Art - Water Marble Nails


Letters To Juliet - Movie Inspired Nail Art - Water Marble Nails

I have tried to depict the letters in the movie and the romance that it portrays. 

Wednesday, January 15, 2014

MoYou London Kitty Collection 09 - Review & Stamping

Hello my lovely nail art crazy friends - if you are smiling as you read this - you know who you are :)

MoYou London Kitty Collection 09 - Review & Stamping
Here is another lovely plate from MoYou London. This is the Kitty Collection Plate 09 and it has smaller designs ranging from flowers, snowflakes and leaves. 

I used this palette to do one of my Christmas nails that you can see in these images as well (for a tutorial please check HERE)

The patterns in this plate are perfect for both short and long nails. These smaller patterns can be stamped multiple times to create gorgeous designs on the nails.

Thursday, January 2, 2014

MoYou London Suki Collection 04 Review & Stamping Nail Art

As you all know I have just forged into the world of stamping and was quite happy with my MoYou London plates (details HERE). Today I am reviewing the MoYou London stamping plate from the SUKI collection. It is number 04.
 
MoYou London Suki Collection 04 - Review
This plate has large designs approximately an inch wide and 1.5cm in height. The patterns are gorgeous. For my short nails only half the pattern can fit but if you have long nails you will simply love these.

I have stamped 5 different patterns from the SUKI collection 04 plate.

Wednesday, December 18, 2013

MoYou Stamping Plates - Curtain Raiser

If you are a fan of stamping nail art you must have heard the name of MoYou London plates. MoYou London is a well known brand which provides tools and accessories to help you achieve salon style nails at home. And the best part is the satisfaction one gets in doing their own nails and getting praises for it!

I have been a huge fan of the lovely nail art done by Puja (Cute Nails) and Dimpal who I consider a stamping expert (Crazy Polishes). My stamping experience was limited to a single small hello kitty plate and a stamper I purchased on a trip to Thailand. I never knew that the quality of plates really mattered.

From Dimpal I learnt about MoYou London plates and one visit to their site got me hooked. A few days back I received my first order from MoYou London which is a selection of four very different plates.
MoYou Stamping Plates
This post is all about sharing my haul and in subsequent posts I will share with you actual stamping nail arts using these gorgeous plates.

Friday, September 13, 2013

4 Different Nail Looks Lead You To Aztec Nail Art

Some time back I had shared a teal colored nail paint from China Glaze called 
After about 4 days of having that nail paint on my hands I started playing around with it. Each day I would go and touch up something to create nail art. I would go back and change something everyday until on the final day when I ended up with my first attempt at Aztec nail art.

Luckily I was taking pictures everyday so now I have a series of nail art that you can do starting off with a simple nail art that you can transform into something more complex.

So to begin with I have silver french tips with a black line and on the accent finger I stamped two dolphins.
Teal and Silver Nail Art - Dolphins

The next day I added some color by drawing another line below the black line using a purple nail color.

linkwithin